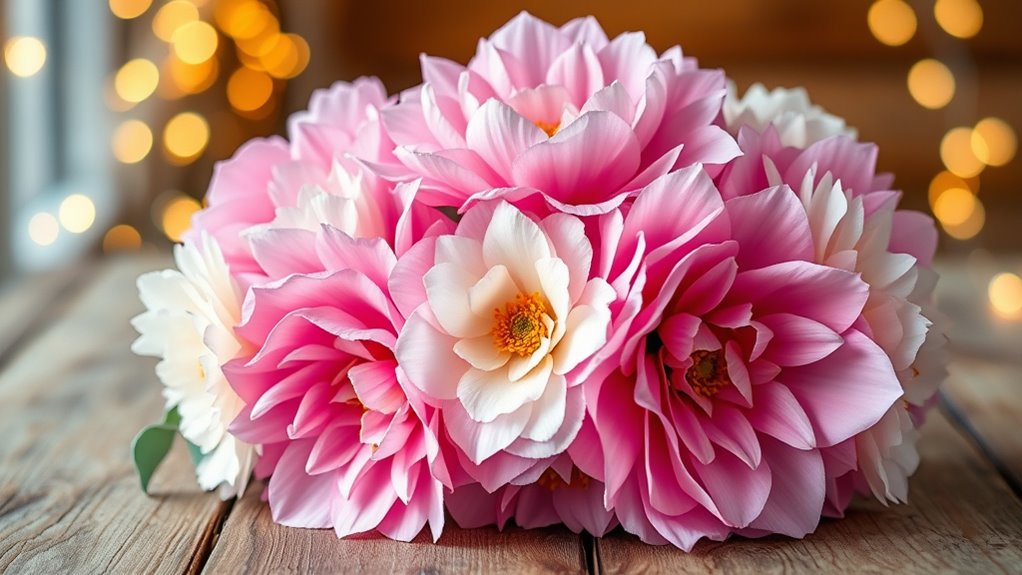
To make DIY tissue paper flowers, start by gathering colorful tissue sheets, scissors, floral wire, and tape. Fold the tissue accordion-style, then cut or scallop the edges for texture. Shape the petals by curling or bending them to create a natural look. Secure the layers with wire and add a decorative center. Fluff and arrange the petals for fullness, then customize with glitter or paint. Keep going, and you’ll discover all the tips for perfecting your blooms!
Key Takeaways
- Gather colorful tissue paper sheets, scissors, floral wire, and tape, then decide on your desired flower style.
- Fold tissue paper accordion-style, then cut edges for petal shapes, choosing straight or scalloped cuts.
- Shape petals by curling edges and bending to mimic natural curves, adding dimension and vibrancy.
- Assemble flowers by wrapping layered tissue with floral wire, securing tightly, and attaching decorative centers.
- Fluff and arrange the flowers, adding embellishments or color accents for a polished, vibrant display.

PACON "KolorFast Tissue Flower Kit, Party Pack, 10"", 84 Flowers" (P0059660)
Party pack
As an affiliate, we earn on qualifying purchases.
As an affiliate, we earn on qualifying purchases.
Gathering Materials and Preparing Your Workspace

Before you begin making tissue paper flowers, it’s important to gather all the necessary materials and set up a clean, organized workspace. Decide on your preferred flower color to match your decor or event theme, and choose tissue paper accordingly. Consider the decorative styles you want to achieve, whether lush, layered, or minimalist, as this influences your material choices. Gather enough sheets of tissue paper in your chosen colors, along with scissors, floral wire or pipe cleaners, and tape. Clear your workspace of clutter, so you have ample room to work comfortably. Having everything within reach guarantees a smooth crafting process. Preparing your space and selecting the right materials sets the foundation for creating beautiful, professional-looking tissue paper flowers.
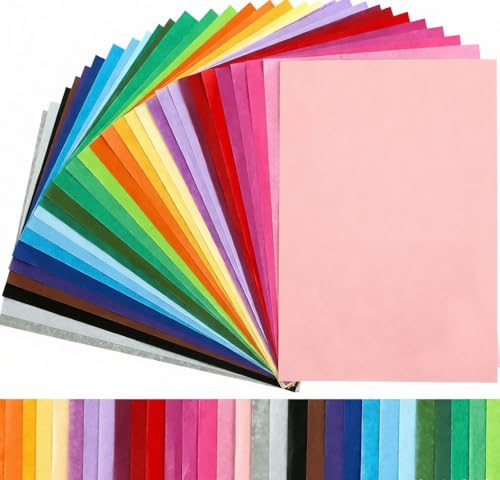
KESOTE Tissue Paper Bulk for Crafts 11.5" x 8" Assorted Colored 300 Sheets 30 Colors Rainbow Tissue Paper for Holidays Christmas Halloween DIY Flower Pom Pom
BULK TISSUE PAPER – Includes 300 small sheets art tissue paper in 30 colors
As an affiliate, we earn on qualifying purchases.
As an affiliate, we earn on qualifying purchases.
Cutting and Folding the Tissue Paper
Start by stacking your tissue paper sheets neatly, usually 6 to 8 layers, depending on how full you want your flowers to be. When it comes to cutting, keep the edges straight or scalloped for different textures, which adds visual interest. Use sharp scissors to cut through all layers at once for uniform pieces. For folding, fold your stacked tissue paper accordion-style, about 1 to 2 inches wide, depending on the desired petal size. Remember, different folding techniques can create varied tissue paper textures—tight folds produce smaller, denser flowers, while looser folds give a more airy look. Be precise with your cuts and folds to ensure your tissue paper flowers turn out symmetrical and full of vibrant texture. Additionally, choosing cutting techniques that suit your design can enhance the overall look of your finished flowers. Incorporating creative folding methods can add unique shapes and dimensions to your flowers, making them more eye-catching and colorful for a striking visual effect. Using quality tissue paper can also impact the durability and appearance of your flowers, making them last longer and look more vibrant.

100 Pcs Floral Stems Wire for Paper Flower,14 Inch 2 Gauge Dark Green Floral Stem Wire,Crafting Floral Stem for Flower Arrangements DIY,Bouquet Stem Wrapping and Crafts
【Package Includes】:You will receive 100 pcs floral stems wire for paper flower.Dark green floral stem wire is very…
As an affiliate, we earn on qualifying purchases.
As an affiliate, we earn on qualifying purchases.
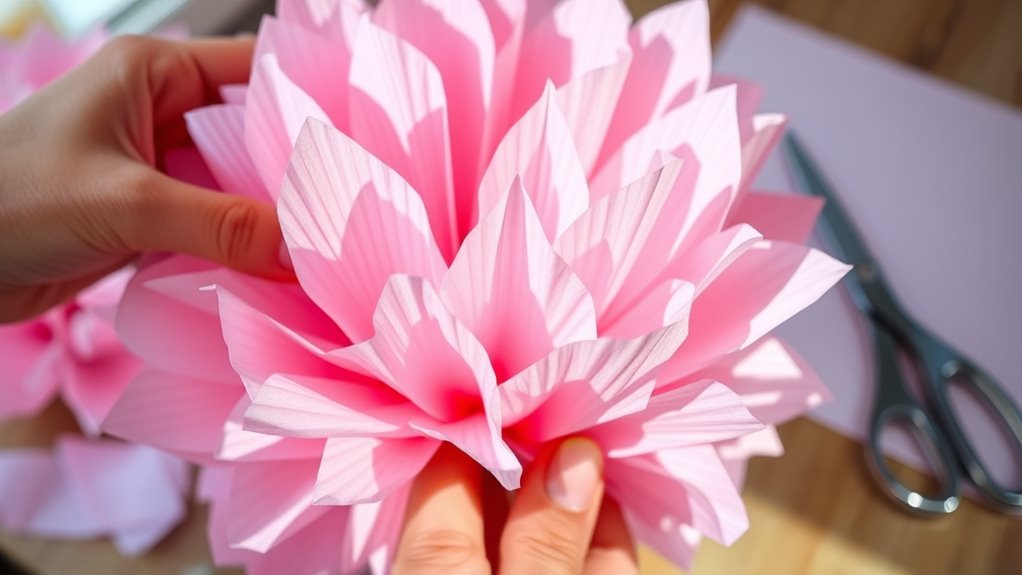
Shaping the Petals for a Realistic Look

To make your tissue paper flowers look more realistic, start by curling the edges of each petal to add dimension. Gently bend the petals to create a natural, soft curve that mimics real flowers. This simple shaping technique instantly brings your blooms to life with a more authentic appearance.
Curl Edges for Dimension
Curl the edges of your tissue paper petals using a pencil, scissors, or your fingertips to create natural, curved shapes. This technique adds dimension and realism to your flowers. Experiment with flower color combinations to enhance visual interest, as contrasting or complementary hues make the petals pop. As you curl, consider petal texture techniques—tight curls for a delicate, ruffled look or gentle bends for a softer appearance. Varying the curl depth can mimic the natural imperfections found in real petals, making your flowers more lifelike. Focus on shaping each petal to catch light differently, which adds depth and vibrancy. Incorporating environmentally friendly decorating practices can further elevate your tissue paper flowers, making them even more stunning. This simple step transforms flat tissue into dynamic, visually appealing blooms that look fresh and authentic, while also supporting local biodiversity by encouraging creative reuse and environmentally friendly decorating practices.
Gentle Petal Bending
Gently bending the tissue paper petals enhances their natural look by adding subtle curves and soft contours. This step makes your flowers appear more realistic and lively. When shaping, consider your flower color choices, as different shades may inspire varying petal curves to match their natural counterparts. Pay attention to petal thickness variations; thicker petals tend to hold shape better, while thinner ones require gentler bending. To achieve the best result, follow these tips:
- Carefully fold and bend each petal to create gentle, natural curves that mimic real flower petals.
- Match your petal shapes to the specific flower color choices for a more authentic appearance.
- Use different bending techniques on varied petal thicknesses to add depth and realism to your flower.
- Remember that fetal movements typically begin around 18-20 weeks, so observing gentle petal curves can be akin to feeling these early signs of life in your flower craft.
- Incorporating fetal development stages concepts can inspire you to appreciate the delicate process involved in shaping realistic tissue paper flowers, much like the growth phases in grobal world plant development.
- Understanding how paint sprayer accessories improve application can help you create smoother, more polished finished flowers, especially when using spray techniques for sealing or adding effects. Additionally, practicing gentle petal shaping techniques can significantly enhance the overall realism of your floral arrangements.

Fabric Pinking Shears, Professional Stainless Steel Handled Scissors, Black, 18mm Scalloped Blade
Scissors Use A grade steel, Environmental protection plastics; Apply for Fabrics, Leather, Linings, Paper, and Craft Uses. Ideal…
As an affiliate, we earn on qualifying purchases.
As an affiliate, we earn on qualifying purchases.
Assembling the Flower and Securing the Center

Once you have all the tissue paper layers stacked and shaped, it’s time to assemble the flower. Begin by folding the stacked layers in half lengthwise, then secure the center with a piece of floral wire, creating a sturdy base. Wrap the wire tightly around the middle, ensuring the layers stay aligned. To add a decorative touch, attach your chosen center decoration, like a small bead or button, to hide the wire. Visualize the process with this imagery:
| Step | Description |
|---|---|
| 1 | Fold tissue layers in half |
| 2 | Wrap floral wire around the center |
| 3 | Secure with tight twisting |
| 4 | Attach center decoration |
This method keeps your tissue layers intact and makes the flower ready for fluffing. Additionally, understanding skincare patches can help you care for your skin more effectively, especially if you want to maintain a clear complexion while working on your crafts. Moreover, understanding IRA tax implications can help you plan your retirement savings more effectively. Additionally, researching bond market trends can provide valuable insights into financial stability and investment opportunities. Furthermore, enhancing your knowledge of cultural intelligence can improve your ability to connect with diverse audiences and collaborate more effectively in international settings. Moreover, considering the financial impact of entertainment industries can provide insight into how wealth is generated and preserved in various careers.
Fluffing and Arranging Your Tissue Paper Flower

After securing the center of your tissue paper flower, it’s time to bring it to life by fluffing and arranging the layers. Gently separate each layer of tissue, creating a full, rounded appearance. Focus on achieving balanced petal texture, ensuring no one layer appears flat or overly dense. When fluffing, consider flower color pairing; contrasting shades can add depth and visual interest. For a natural look, slightly bend or curl the petals’ edges to mimic real flowers. To enhance your arrangement, rotate the flower as you fluff, ensuring all sides are evenly shaped. Additionally, paying attention to flower symmetry can help your tissue paper flower look more realistic and aesthetically pleasing. Incorporating sensory toys into your craft process can also help engage young children in the activity, making it a fun and educational experience. This step transforms your craft into a lively, vibrant bloom ready to be displayed or used in decor, helping you create a cohesive and well-arranged floral display.
Customizing and Displaying Your Beautiful Blooms
To make your tissue paper blooms truly stand out, customize their appearance by adding details like glitter, paint accents, or small embellishments. Choose flower color choices that match your event or decor theme, creating a cohesive look. You can dip the edges in metallic paint for a shimmering effect or sprinkle glitter for extra sparkle. Small embellishments like faux pearls or tiny rhinestones can add a touch of elegance. When it comes to display ideas, consider arranging your flowers in vibrant bouquets, hanging garlands, or centerpieces. Use colorful vases or decorative jars to enhance their visual impact. Personalizing your blooms with these touches not only elevates their beauty but also creates a memorable ambiance for any occasion.
Frequently Asked Questions
Can I Use Different Colors for a Multi-Colored Flower?
Yes, you can definitely use different colors for a multi-colored flower. Experiment with various color combinations to create vibrant, eye-catching blooms. To enhance the effect, focus on petal blending by layering shades carefully, which adds depth and dimension. Mix contrasting or complementary colors to make each petal stand out. Just guarantee the colors you choose work well together for a harmonious, beautiful result that reflects your creative style.
How Long Do Tissue Paper Flowers Last Indoors?
Indoor tissue paper flowers typically last about one to two weeks with proper indoor care. Their longevity depends on factors like humidity, handling, and exposure to sunlight. To extend flower longevity, keep them away from direct sunlight and high humidity, and handle them gently. With good indoor care, you can enjoy their vibrant look for up to two weeks, making them a lovely, temporary decorative option.
What Tools Are Best for Cutting Tissue Paper Neatly?
To cut tissue paper neatly, you should use precision scissors or craft blades. Precision scissors help you make clean, accurate cuts, especially for detailed designs. Craft blades are excellent for trimming straight lines or intricate patterns, giving you control and precision. Always guarantee your blades are sharp to prevent tearing and achieve professional-looking results. With the right tools, you’ll create perfect tissue paper flowers effortlessly.
Can I Make Flowers Larger Than Standard Sizes?
You can definitely make tissue paper flowers larger than standard sizes with some smart scaling techniques. Don’t let size limitations hold you back—think big! Use bigger sheets, double the layers, and extend your petal shapes. Scaling techniques allow you to craft giant blooms that wow everyone. Just remember, larger flowers may need sturdier wire or additional support to maintain their shape, but the result will be stunningly impressive and worth the effort.
How Do I Store Tissue Paper Flowers to Prevent Damage?
To prevent damage to your tissue paper flowers, you should use proper preservation techniques. Store them in sturdy storage containers that protect against crushing and moisture. Keep the containers in a cool, dry place away from sunlight to prevent fading and deterioration. If possible, gently place tissue paper flowers flat or upright, ensuring they aren’t squished. Proper storage helps maintain their beauty and prolongs their lifespan.
Conclusion
Now that you’ve crafted your tissue paper flower, remember that each bloom is a tiny miracle, a reminder that beauty can blossom from simple materials. With your newfound skills, you hold the power to brighten any space and create your own garden of endless possibilities. Keep experimenting and let your creativity grow wild—because, like flowers, your unique touch can turn the ordinary into something truly extraordinary. Your DIY blooms are just the beginning of a beautiful journey.