
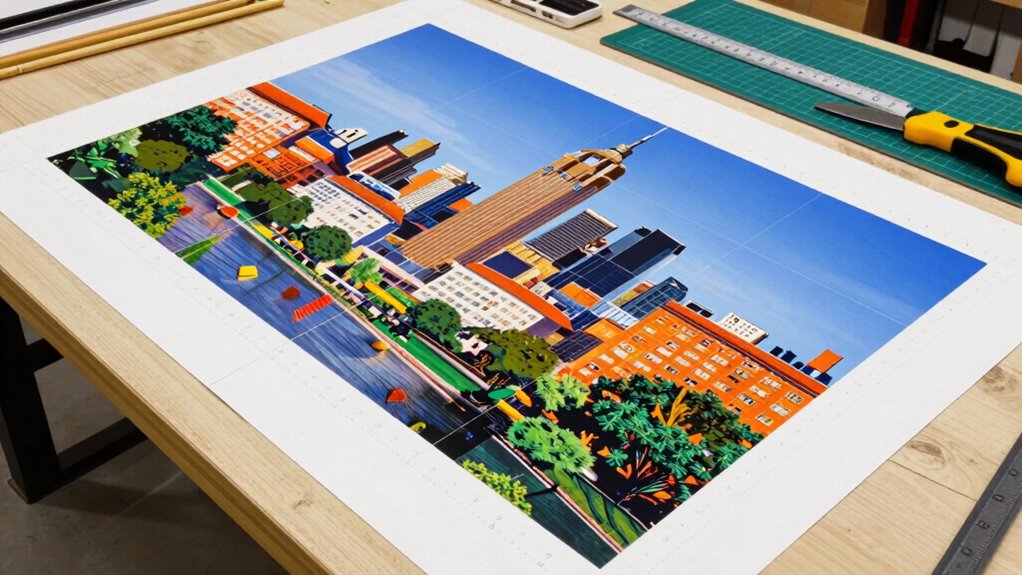
To split a large print like a pro, start with a high-resolution, correctly cropped image set at 300 DPI for sharp detail. Use software like Adobe Photoshop, GIMP, or PosteRazor to divide your image into precise sections, guaranteeing consistent colors and seamless edges. Align tiles carefully during assembly with spacers or trims, choose durable materials, and pay attention to color calibration and proper installation techniques. Keep exploring further steps to ensure a flawless, professional result.
Key Takeaways
- Use image editing software (e.g., Photoshop, GIMP) to crop, guide, and mark tile boundaries precisely.
- Maintain consistent resolution and aspect ratio across all tiles to ensure seamless assembly.
- Enable edge blending, overlaps, or guides for smooth transitions between tiles.
- Calibrate monitors and printers for accurate color matching and sharp detail in each section.
- Carefully align and secure tiles during assembly to prevent misalignment and ensure a professional finish.
large format image tiling software
As an affiliate, we earn on qualifying purchases.
As an affiliate, we earn on qualifying purchases.
Is Tiling Big Prints Right for Your Wall Art?

Deciding whether tiling big prints is right for your wall art depends on a few key factors. First, consider your wall color; neutral or solid backgrounds often enhance tiled images, making them stand out without clashing. If your wall has a bold or busy color, tiling can help break the image into manageable sections, easing visual overwhelm. Next, think about framing options—tiled prints can be displayed with minimal framing, or you might opt for custom frames that complement each section. Tiling also allows flexibility in arranging the pieces, which can suit various wall sizes and shapes. Ultimately, if you want a striking, large-scale display that can be customized to your space, tiling big prints could be an excellent choice for your wall art.
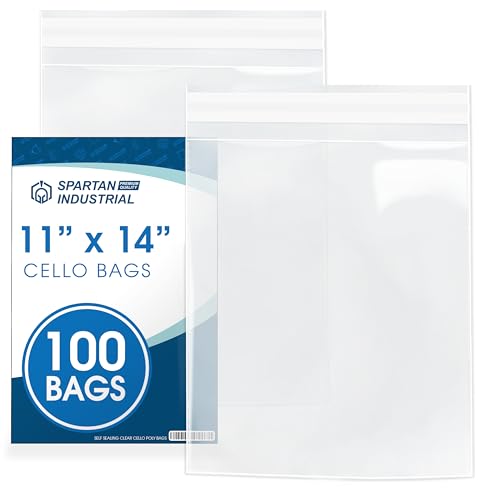
11" X 14" Self-Sealing Cellophane Bags (100 Count) Clear Poly Packaging for Clothing, Prints, Photos, Documents – Reinforced Resealable Cello Bags for Small Business Shipping – Spartan Industrial
Specifications: 11 X 14 inch self sealing cellophane bags, length excludes the glue flap, 100 count. 1.5 mil…
As an affiliate, we earn on qualifying purchases.
As an affiliate, we earn on qualifying purchases.
Why Tiling Makes Large-Scale Prints Easier and More Affordable

Tiling large prints helps you save money by using more affordable printing options. It also makes the production process simpler, breaking down big projects into manageable steps. As a result, you get impressive, large-scale artwork without breaking the bank or complicated logistics.
Cost-Effective Printing Solutions
Because large-format printing can be prohibitively expensive and technically challenging, tiling offers a practical and budget-friendly solution. By splitting your image into smaller sections, you reduce material costs and avoid the need for high-end printers. Tiling allows you to work with standard-size printers, saving you money on specialized equipment. This cost-saving approach makes it easier to produce stunning large prints without breaking the bank. It also provides flexibility, so you can choose the most affordable materials and printing options for each section. Additionally, understanding multi-unit setups can help optimize the printing process for large projects. Incorporating color accuracy considerations ensures that each tile maintains visual consistency across the entire print. Being aware of color management techniques can further enhance the overall quality of your large-scale prints. Whether for personal projects or professional displays, tiling is a smart, budget-friendly technique for large prints.
Simplifies Large-Format Production
Splitting a large image into smaller sections streamlines the entire printing process, making it more manageable and less prone to issues. Tiling simplifies large-format production by allowing you to focus on each segment individually, reducing material waste and easing handling. This approach also helps guarantee consistent quality through proper color calibration across tiles, preventing mismatched tones. When selecting materials, you can choose the right type and thickness for each section, improving durability and finish. Additionally, tiling enables easier adjustments or corrections before final assembly, saving time and cost. Overall, breaking down the project makes large-scale printing more accessible, controlled, and affordable, eliminating common challenges associated with oversized prints.

Vintage Ocean View Window Canvas Wall Art, High-Resolution Print with Fresh Blue and White Hydrangeas and Butterflies, Rustic Style Decor for Bathroom, Bedroom, Office Framed 12"X16"
Stunning Scenery: This framed canvas wall art print captures the serene beauty of a beach landscape with an…
As an affiliate, we earn on qualifying purchases.
As an affiliate, we earn on qualifying purchases.
How to Prepare Your Image for Tiling: Resolution, Format, and Aspect Ratio
To get your image ready for tiling, you need to focus on setting the right resolution so your print stays sharp. Choosing the proper file format guarantees your image maintains quality without unnecessary size. Also, keeping the aspect ratio correct prevents distortion and guarantees your tiles align perfectly. Additionally, understanding personal finance planning principles can help you allocate your resources efficiently for any project, including large-format printing. Maintaining proper climate control in your workspace can further improve print quality and prevent issues caused by humidity or temperature fluctuations. Being aware of decorative elements like masks can also inspire design choices that enhance the aesthetic appeal of your tiled prints. Moreover, considering tax law changes can be beneficial if you are investing in professional printing equipment or services.
Optimal Resolution Settings
Preparing your image with the right resolution is crucial for ensuring high-quality large prints. Set your resolution to at least 300 DPI for sharp details and color calibration accuracy, which enhances color consistency across the print. Higher resolutions prevent pixelation when enlarging, maintaining print durability and visual clarity. Keep in mind that larger images require more memory and processing power. Understanding optimal resolution can greatly improve your print results by aligning your image’s quality with printing standards. Adjust resolution according to your final print size to avoid unnecessary file size. Use consistent DPI settings across all sections for uniform quality. Make certain your image’s resolution aligns with your printer’s capabilities to optimize color calibration and longevity.
Suitable File Formats
Have you chosen the right file format to guarantee your large print tiles look sharp and true to color? Selecting a compatible file format is vital for maintaining image quality during printing. Formats like TIFF and PNG are popular because they support high-resolution images without excessive compression, ensuring sharp details and accurate colors. Avoid formats with poor file format compatibility, which can lead to unintended color shifts or loss of detail. Be mindful of image compression; excessive compression in JPEG files can introduce artifacts that distort your image, especially in large prints. For the best results, choose lossless formats or high-quality settings to preserve detail. Properly prepared files ensure your printed tiles will look vibrant, clear, and professional. Additionally, understanding the importance of image resolution can help prevent pixelation and ensure your print quality remains high.
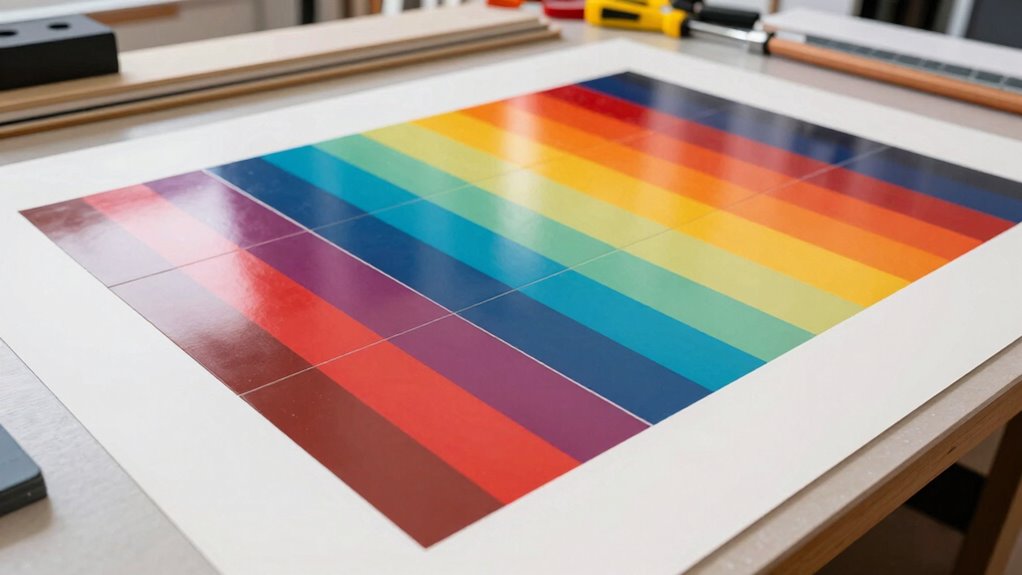
Maintaining Correct Aspect Ratio
Ensuring your image maintains the correct aspect ratio is key to achieving a seamless, professional-looking tiled print. Preserving proper image proportions prevents distortion and guarantees your final display matches your vision. To do this effectively:
- Check your image’s aspect ratio before editing or resizing.
- Use editing tools to lock aspect ratio when adjusting dimensions.
- Avoid stretching or squishing images, which can ruin proportions.
- Incorporate Free Floating techniques to ensure your image seamlessly integrates into the final tiled layout.

Calibrite Display 123 Monitor Calibration Colorimeter for Photo Editing and Color Accurate Viewing, Easy 1 2 3 Software Workflow, USB C Connection, and Before and After Check, Supports 2 Displays
SPECIFICATIONS: Monitor calibration colorimeter with Easy 1 2 3 software workflow, USB C connection, compact body approx. 34mm…
As an affiliate, we earn on qualifying purchases.
As an affiliate, we earn on qualifying purchases.
How to Pick the Perfect Tile Size for Your Print
Choosing the right tile size for your print is essential to achieving a balanced and visually appealing result. Your tile size impacts how the image resolution translates across printed sections, so selecting appropriately guarantees sharp, detailed output. If your tiles are too large, you risk losing detail and making the print appear pixelated when viewed up close. Conversely, overly small tiles can complicate assembly and increase printing costs. To determine the ideal tile size, consider your overall print dimensions and the resolution of your image. A higher image resolution allows for larger tiles without sacrificing clarity, while lower resolutions require smaller tiles to maintain quality. Striking the right balance ensures each tile complements the whole, making your huge print look professional and seamless. Understanding resolution scaling can help you better interpret instructions and communicate your needs during the printing process. Additionally, being aware of watt-hours and capacity can help you plan the printing process efficiently if you are using electronic devices to prepare or assemble your tiles. Proper planning of tile dimensions not only reduces material waste but also enhances assembly efficiency, ensuring a smoother workflow throughout your project.
What Software Should You Use to Split Your Image?

Choosing the right software to split your image is key to a successful print. You can select from popular options that range from free tools to paid programs, depending on your needs. Let’s explore the best software choices to make your tiling process smooth and efficient. Additionally, understanding how to handle filter failures and optimize flow can help ensure your large prints come out perfectly without interruptions. Being aware of digital workflow management can further streamline your process and prevent common issues during large-format printing. Incorporating software compatibility considerations can also ensure your chosen tools work seamlessly with your existing setup.
Popular Tiling Software
When it comes to splitting large images for printing, selecting the right tiling software can make all the difference. Popular options like Adobe Photoshop, PosteRazor, and GIMP offer powerful tools to simplify the process. These programs often include features for precise material selection, ensuring your chosen paper or canvas matches your project needs. They also support color matching, helping your tiles maintain consistent hues across sections. Additionally, understanding the importance of smart lifestyle tips can help you choose software that fits seamlessly into your workflow, making the entire process more efficient and enjoyable. Being aware of household safety considerations can also guide you in selecting tools that promote a safe and efficient workspace during your project.
Free vs Paid Options
Are free tiling software options sufficient for your large printing projects, or is investing in paid tools worth the extra cost? Free programs like PosteRazor or GIMP can handle basic tiling, but they may lack advanced features such as precise color matching and ensuring print durability. Paid options, like Adobe Photoshop or specialized tiling software, offer better control over color accuracy and print quality, which is vital for professional results. Here’s a quick comparison:
| Feature | Free Options | Paid Options |
|---|---|---|
| Color Matching | Basic, limited | Precise, adjustable |
| Print Durability | Basic, less control | Enhanced, with fine-tuning |
| Ease of Use | Varies, often complex | User-friendly, streamlined |
| Cost | Free | Paid |
Additionally, understanding content quality can help you choose the best software for your needs, ensuring your final print meets your expectations.
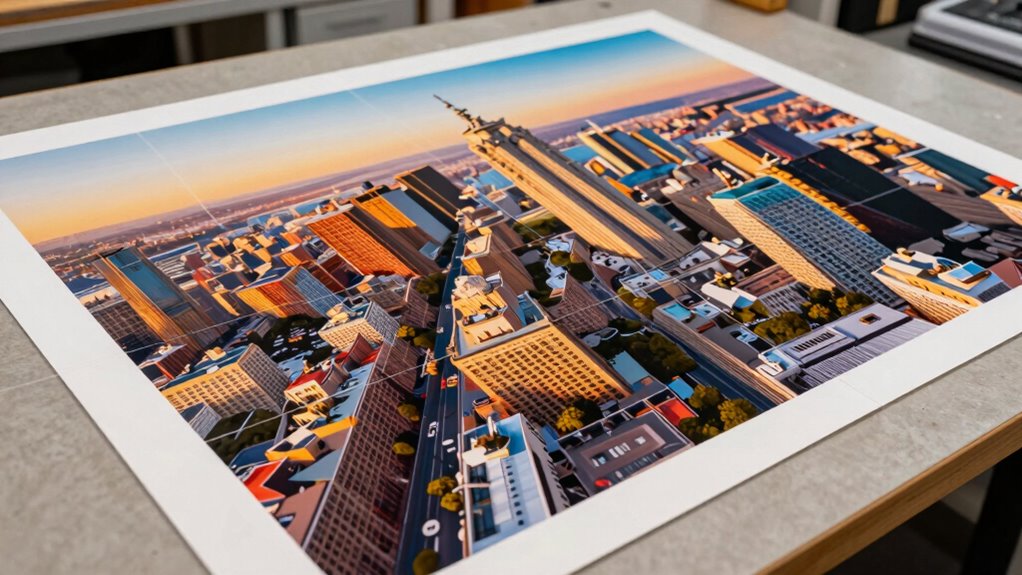
Step-by-Step: How to Tile Your Image Seamlessly
To tile your image seamlessly, start by preparing your original file in an image editing program like Photoshop or GIMP. Make certain your image is high-resolution and correctly cropped. Next, consider color matching across tiles to avoid visible inconsistencies, and choose a frame that complements the overall design. Additionally, exploring sound healing science can inspire calming themes for your display, creating a more immersive visual experience. Remember to properly calibrate your monitor to ensure color accuracy during editing. – Adjust contrast and brightness for uniformity – Use guides to mark tile boundaries precisely – Select a frame style that enhances the image without distracting from the tiles. Also, incorporating eco-friendly disposal tips can help reduce waste when managing your project materials.
How to Keep Colors and Edges Aligned When Tiling
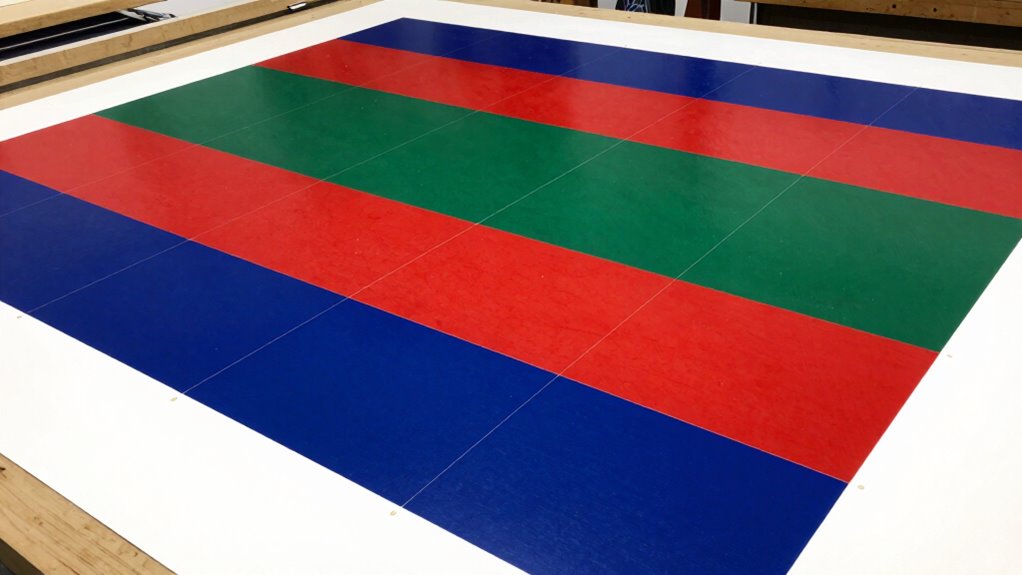
Ensuring colors and edges stay aligned as you tile your image requires careful attention to detail. Start with precise color matching across all tiles by using consistent color profiles and adjusting for any color shifts during editing. When placing tiles, use overlapping edges and enable edge blending features in your software to create seamless transitions. Pay close attention to the color gradients near the edges, ensuring they flow smoothly from one tile to the next. Avoid abrupt changes by fine-tuning the color adjustments and blending settings. Consistent lighting and color calibration on your monitor help maintain accuracy. Proper edge blending techniques eliminate visible seams, making your final large print appear continuous and professional. This careful approach guarantees your huge print looks cohesive and flawless.
Tips for Printing Your Tiles: Materials, Settings, and Best Practices
When preparing to print your tiles, selecting the right materials and settings is essential for achieving sharp, vibrant results. Start with quality paper selection to guarantee color accuracy and durability. Use tape adhesives to secure tiles during printing, preventing shifting and misalignment. Adjust your printer settings for high resolution and color calibration, matching the intended output. Consider the type of ink and paper compatibility to avoid smudging or fading.
- Choose heavy, matte or glossy paper suited for your project
- Use tape adhesives to keep tiles in place during printing
- Set your printer to the highest quality mode for sharp details and vibrant colors
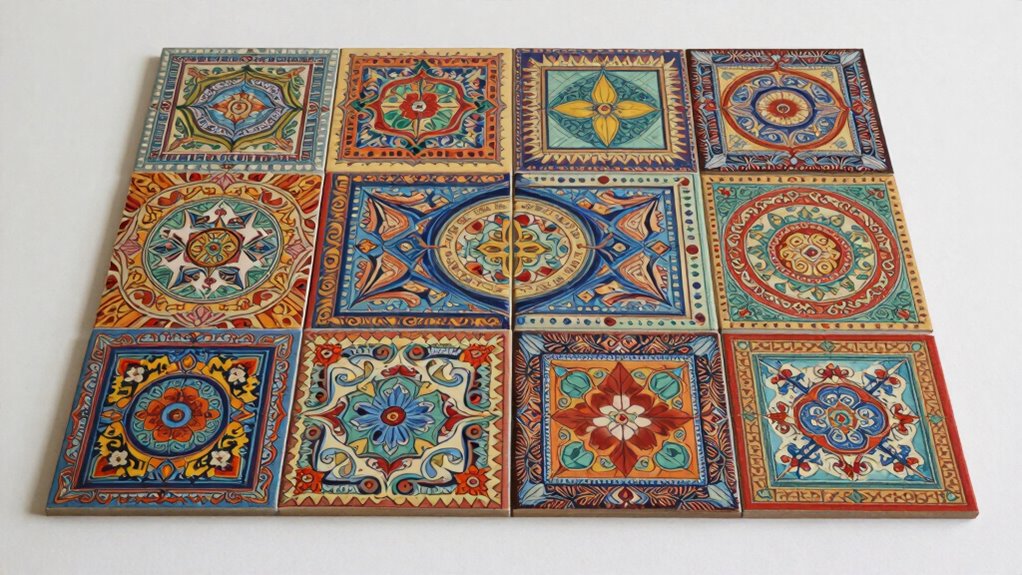
How to Assemble and Frame Your Tiled Wall Art for a Flawless Finish
Assembling and framing your tiled wall art requires careful attention to detail to achieve a professional finish. Start by aligning the tiles precisely, using framing techniques like spacer strips or edge trim to ensure straight borders and even gaps. When framing, choose a sturdy frame that complements your artwork’s style and provides support. Wall mounting strategies are equally important; use appropriate hardware such as anchors or hooks suited for your wall type to securely hold the weight. Before hanging, double-check the placement to maintain symmetry and levelness. Secure the tiles firmly to prevent shifting over time. Proper framing techniques combined with effective wall mounting strategies result in a clean, polished look that elevates your tiled wall art from DIY project to gallery-quality display.
Troubleshooting Common Tiling Problems and Creative Display Ideas

Even with careful planning, tiling projects can encounter common issues such as uneven grout lines, cracked tiles, or adhesive mishaps. To troubleshoot, start by checking your mounting techniques to ensure tiles are firmly and evenly attached. For color matching problems, consider using grout or sealants that complement or enhance your print’s hues, creating a seamless look. If tiles crack or shift, reapply adhesive or adjust mounting techniques for better stability. For display ideas, consider creative arrangements like asymmetrical layouts or incorporating lighting to highlight your tiles. You can also add decorative borders or contrasting grout colors to hide imperfections and add visual interest. Addressing these issues promptly helps you achieve a polished finish and elevates your large print display.
Frequently Asked Questions
Can Tiling Be Used for Three-Dimensional or Curved Surfaces?
Yes, tiling can be used for 3D surface adaptation and curved surface tiling. You’ll need to carefully plan your cuts and use software that handles complex geometries, ensuring the image aligns smoothly on the curved or uneven surface. By adjusting the tiles to match the surface’s contours, you create a seamless look. It takes precision, but with the right tools, you can achieve stunning results on any three-dimensional or curved surface.
What Are the Environmental Impacts of Different Printing Materials?
You should consider the environmental impacts of printing materials to make greener choices. Using eco friendly inks reduces harmful emissions, while recycled substrates help lessen waste and conserve resources. These options not only support sustainability but also lessen your ecological footprint. By choosing environmentally conscious materials, you contribute to a healthier planet, all while creating stunning prints that reflect your commitment to eco-responsibility and innovation.
How Does Lighting Affect the Appearance of Tiled Large Prints?
Lighting conditions greatly impact how your tiled large prints look. Bright, natural light enhances color vibrancy and reveals details, while dim or uneven lighting can cause shadows and distort color consistency. To guarantee your prints appear their best, position them where lighting is even and adjustable. Use consistent, neutral lighting to maintain accurate color representation across all tiles, making your large print display visually cohesive and striking.
Are There Any Health Considerations When Handling Large-Format Printing Materials?
When handling large-format printing materials, you should prioritize ergonomic safety and handle chemicals carefully. Use proper lifting techniques to avoid strain and wear gloves when dealing with inks and solvents to prevent skin irritation. Guarantee good ventilation in your workspace to reduce chemical inhalation risks. Always follow manufacturer instructions and safety guidelines to protect yourself, especially when working with potentially hazardous chemicals, and take breaks to prevent fatigue.
What Are the Long-Term Maintenance Tips for Tiled Wall Art?
To keep your tiled wall art looking great long-term, establish regular cleaning routines with gentle, non-abrasive cleaners. Apply protective coatings, like sealants, to prevent dirt buildup and water damage. Check for grout cracks or chips periodically and repair them promptly. Avoid harsh chemicals or abrasive tools that can damage tiles. Proper maintenance guarantees your wall art stays vibrant and intact for years, saving you time and money.
Conclusion
Tiling your large prints might seem intimidating at first, but with the right tools and a bit of patience, you’ll have a stunning wall feature that’s worth the effort. Think of it as hitting two birds with one stone—you get a professional look without breaking the bank. So roll up your sleeves, follow these tips, and remember, patience is a virtue. Before you know it, you’ll have turned a big project into a work of art.