
To solve issues like silvering, bubbles, and tunneling on your laminator, start by ensuring your documents are clean, dry, and properly aligned before feeding them in. Adjust your laminator’s temperature, pressure, and speed according to the material specifications, and perform routine maintenance like cleaning rollers. Using compatible, high-quality films also helps. If problems persist, fine-tune your settings and follow proper loading techniques—more tips await to help you achieve flawless laminations.
Key Takeaways
- Ensure proper laminator settings for temperature, pressure, and speed tailored to your materials.
- Regularly clean and maintain rollers to prevent debris buildup causing bubbles and tunneling.
- Use high-quality, compatible lamination films and prepare documents to avoid silvering and surface defects.
- Properly load documents flat, centered, and without wrinkles to prevent air pockets and uneven sealing.
- Troubleshoot persistent issues by checking machine alignment, adjusting settings, and performing routine maintenance.

Usoraszkt Watch Case Opener Press-Fit Tool Kit Case Back Crystal Laminator with 25 Press-Fit Die Assy Watch Repair Tool for Home, Watch Shop
THOUGHTFUL DESIGN: Compared with ordinary angled watch presses, our product uses vertical downward pressure so that the power…
As an affiliate, we earn on qualifying purchases.
As an affiliate, we earn on qualifying purchases.
What Causes Silvering, Bubbles, and Tunneling in Laminators?
Silvering, bubbles, and tunneling are common issues that can occur during lamination, often caused by improper settings or material problems. To prevent these issues, you need to focus on laminator maintenance, ensuring your machine runs smoothly and consistently. Regular cleaning of rollers and checking for worn parts help reduce air pockets that cause bubbles. Additionally, film compatibility plays a vital role; using the wrong type or quality of lamination film can lead to silvering and tunneling. When selecting film, verify it matches your laminator’s specifications. Proper maintenance and choosing compatible film materials minimize these problems, leading to clearer, more professional results. Staying attentive to your laminator’s condition and the materials you use is key to avoiding silvering, bubbles, and tunneling. Being aware of lamination film quality and its impact on the process can further help prevent these issues. Furthermore, understanding how machine settings influence the lamination process allows for better control and fewer defects. Regularly monitoring heat and pressure adjustments can also significantly reduce the occurrence of these common lamination defects. Additionally, maintaining optimal roll tension is essential to prevent wrinkles and uneven lamination. Paying close attention to material storage conditions can help prevent issues caused by moisture or contamination.

13 Inch Laminator Machine 11×17 with Laminating Sheets Personal Laminator for Teachers, 60S Warm Up Cold Thermal Lamination Machine for Home Office, A3 Laminating Machine Portable Paper Laminate Kit
60-Second Warm-Up, Efficient Productivity: Stop Wasting 3-5 Minutes Waiting for Your laminator machine to Heat Up. The Qfun…
As an affiliate, we earn on qualifying purchases.
As an affiliate, we earn on qualifying purchases.
How to Prepare Your Documents for Smooth Laminating Results
To achieve professional-looking laminated documents, proper preparation is key. Start with clean, dry documents to prevent dust or moisture from causing bubbles or silvering. Handle your papers carefully to avoid fingerprints, wrinkles, or tears, which can lead to uneven lamination. Before laminating, check your laminator maintenance—clean the rollers and ensure it’s functioning properly to prevent jams or tunneling. Use the appropriate size and type of lamination pouch, leaving a small border around your document to ensure a good seal. Always align your paper correctly to avoid skewed results. Taking these steps helps prevent common issues and ensures a smooth, professional finish every time. Proper document handling combined with regular laminator maintenance makes a significant difference in your laminating success.

Fellowes Laminator Cleaning Sheets, 10 Pack, 8.5 x 11 in
Extend laminator lifespan: Compared to regular card stock, Fellowes laminator cleaning sheets feature a coating that picks up…
As an affiliate, we earn on qualifying purchases.
As an affiliate, we earn on qualifying purchases.
How to Choose the Right Laminator Settings to Prevent Problems

To prevent problems, you need to choose the right laminator settings from the start. Adjust the temperature to suit your material, set the proper pressure, and use the correct speed for smooth results. Getting these settings right guarantees your laminating process goes without issues. Additionally, understanding the home design and architecture principles can help ensure your laminator is used effectively for projects involving architectural details.
Adjust Temperature Settings
Choosing the correct temperature setting on your laminator is essential for preventing issues like bubbles, wrinkles, or uneven sealing. Proper temperature controls guarantee laminator safety and minimize environmental impact by reducing waste and energy use. To dial in the right temperature:
- Check the manufacturer’s recommended settings for your laminating film.
- Start with a lower temperature and gradually increase until the material seals smoothly.
- Consider the thickness of your lamination; thicker materials often need higher heat.
- Regularly monitor the laminator’s performance to avoid overheating, which can damage your documents and increase energy consumption.
- Understanding the safety features of your laminator can help prevent accidents and ensure proper operation.
- Adjusting the temperature carefully also helps in preventing material damage and ensuring consistent results.
- Being aware of environmental impact can guide you toward energy-efficient settings and reduce waste during lamination.
Adjusting the temperature carefully helps prevent problems and supports eco-friendly practices. It also ensures your laminator operates safely and efficiently, giving you professional results every time.
Set Proper Pressure
Proper pressure is essential for achieving smooth, bubble-free lamination and preventing document damage. To guarantee this, start with accurate pressure calibration on your laminator. Regularly check and adjust the pressure settings to match the manufacturer’s recommendations for your materials. Correct roller alignment also plays a critical role; misaligned rollers can cause uneven pressure, leading to bubbles or tunneling. Carefully inspect the rollers and realign them if needed, following your machine’s manual. Proper calibration and roller alignment are key to ideal lamination results. Consistent, appropriate pressure helps the laminator evenly distribute heat and adhesive, resulting in a professional finish. Remember, too much pressure can cause wrinkles or creases, while too little can allow air bubbles to form. Monitoring pressure consistency throughout the process ensures optimal results and helps prevent common laminator problems. Additionally, understanding how climate conditions affect adhesive flow can help you adjust settings for optimal lamination quality. Being aware of material types and their specific requirements can further improve your lamination outcomes. Maintaining proper machine maintenance routines also contributes significantly to achieving high-quality lamination results.
Use Correct Speed
Setting the correct speed on your laminator guarantees your documents come out smooth and free of issues. Moving too fast can cause bubbles, silvering, or tunneling, while going too slow may lead to overheating or damage. To choose the right speed, consider these factors:
- Laminator maintenance—regularly clean and check rollers for smooth operation.
- Paper compatibility—use appropriate paper types and thicknesses for your laminator’s settings.
- Material thickness—thicker materials need slower speeds to prevent problems.
- Test runs—practice on scrap sheets to fine-tune your speed before laminating important documents.
Balancing these factors helps prevent problems like bubbles or silvering, ensuring your laminated items look professional and last longer.

Scotch Thermal Laminator, 2 Roller System for a Professional Finish, Use for Home, Office or School, Suitable for use with Photos (TL901X)
LAMINATING MACHINE: One Scotch TL901X Thermal Laminator to help you protect frequently used school documents, assignments and instruction…
As an affiliate, we earn on qualifying purchases.
As an affiliate, we earn on qualifying purchases.
How to Properly Load and Position Items to Avoid Tunneling
To prevent tunneling when using your laminator, it’s essential to load and position items correctly. Start by ensuring proper item alignment so that your materials are straight and centered. Use loading techniques that keep the document flat and smooth, avoiding wrinkles or folds that can cause uneven heat distribution. Before feeding, gently press the items to remove any air bubbles or creases, and place them at the edge of the laminator’s entry tray. Keep the item flat and aligned with the rollers to ensure even pressure throughout the lamination process. Do not overload the machine or push items in at an angle, as this increases the risk of tunneling. Proper loading and precise positioning are key to achieving a smooth, bubble-free finish.
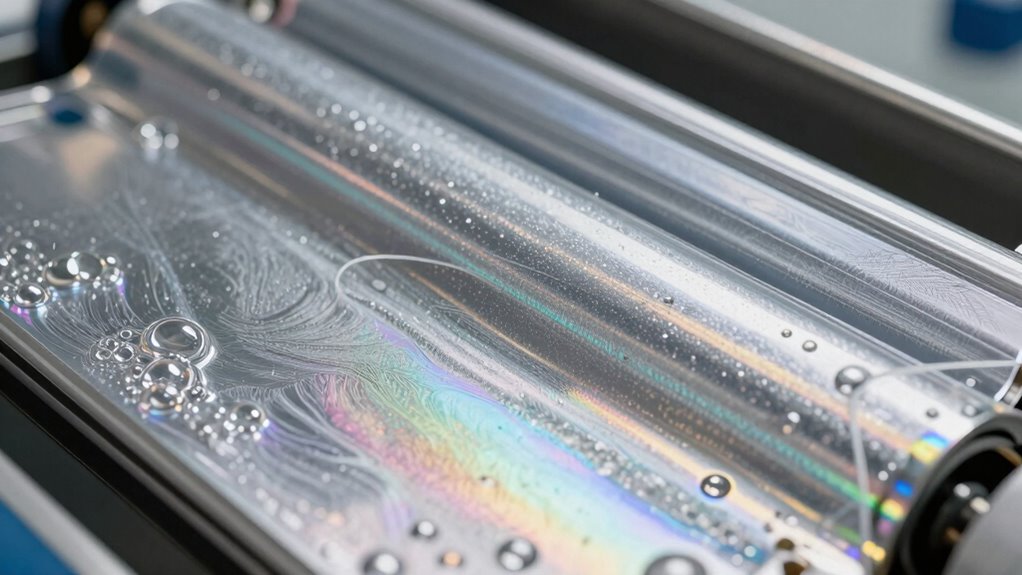
How to Eliminate Air Bubbles During Laminating

To eliminate air bubbles during laminating, start by ensuring your surface is clean and smooth. Use the correct laminating technique by applying even pressure and moving steadily through the machine. Proper preparation and technique will help you achieve a bubble-free finish every time. Additionally, maintaining proper laminate temperature and pressure is essential for optimal adhesion and preventing bubbles. Using a quality laminator can also reduce the likelihood of bubbles forming during the process. Ensuring the laminating materials are of good quality and compatible can further minimize issues with air entrapment. Being aware of laminate tension can also help in achieving a uniform and bubble-free lamination. Furthermore, adjusting laminate speed can play a crucial role in avoiding the formation of air pockets during the process.
Proper Surface Preparation
Air bubbles are a common issue during laminating, but you can prevent them by properly preparing your surface beforehand. Start with a clean, dust-free surface to avoid debris that can trap air. Use the correct document sizing to ensure even adhesion and reduce air pockets. Apply a uniform layer of laminating adhesives if needed, avoiding excess that can cause bubbles. Finally, wipe the surface with a lint-free cloth to remove fingerprints or oils that may interfere with adhesion. Proper surface prep helps ensure smooth lamination and minimizes bubbles. Here are key steps:
- Clean the surface thoroughly.
- Use appropriate document sizing.
- Apply laminating adhesives evenly.
- Wipe with a lint-free cloth.
- Address caregiver emotional health by staying mindful of your stress levels during the laminating process, as stress can affect attention to detail and lead to mistakes.
Correct Laminating Technique
Achieving a bubble-free lamination requires careful technique throughout the process. First, ensure proper paper alignment to prevent uneven pressure that causes bubbles. Always prioritize laminating safety by handling the machine carefully and wearing protective gear. When feeding your document, smooth it out to remove wrinkles and air pockets. Use a squeegee or a roller to gently press out air as you feed it through the laminator. Keep your speed steady to avoid trapping air. Here’s a quick guide:
| Step | Action | Tip |
|---|---|---|
| Paper Alignment | Position paper precisely | Use guides for accuracy |
| Feeding | Insert slowly and evenly | Maintain consistent speed |
| Squeegeeing | Remove air with a squeegee | Apply gentle, even pressure |
| Heat Settings | Match laminator settings to material | Follow manufacturer instructions |
| Safety | Handle with care, avoid injuries | Turn off machine after use |
How to Fix Silvering for a Clear, Professional Finish
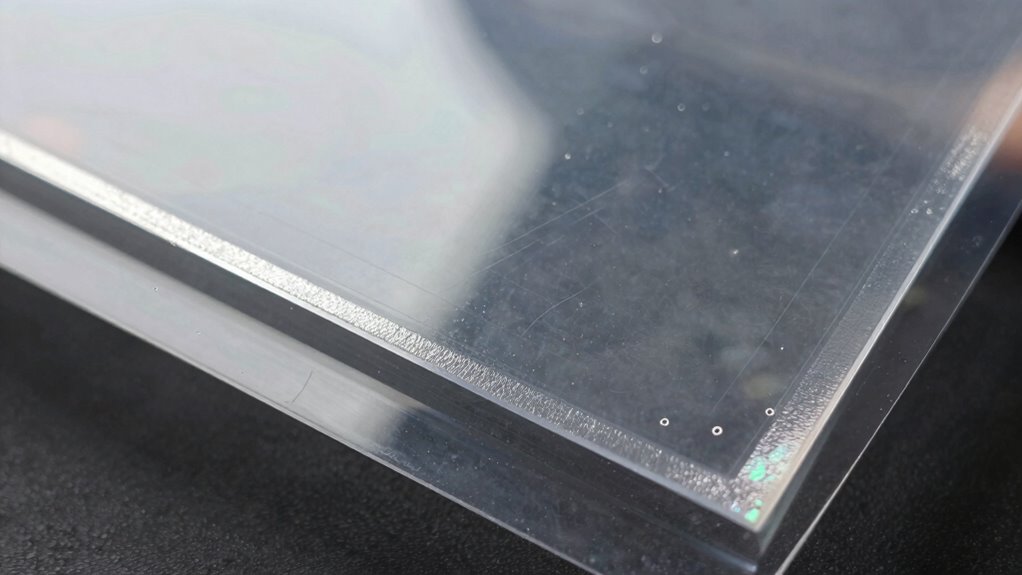
Silvering appears as a shiny, reflective layer that can ruin the clarity of your laminated project. To fix this, start by evaluating your laminating process. Here are some key steps:
- Check your pressure and temperature settings—incorrect levels cause silvering.
- Use silvering solutions or anti-silvering sprays designed for laminators.
- Ensure your sheets are perfectly aligned to prevent air pockets.
- Apply finishing techniques like gradual cooling or pressing to reduce trapped air.
How to Maintain Your Laminator to Prevent Common Issues
To keep your laminator running smoothly, you should regularly clean the rollers to prevent buildup. Make sure you’re using the proper temperature settings for your materials, and always store your laminator in a safe, dry place. These simple steps help prevent common issues and extend the life of your machine. Additionally, understanding the filtration/suction basics can help you troubleshoot issues related to adhesive bonding and material feed. Properly managing sound design techniques can also assist in diagnosing operational problems with your equipment. Regularly inspecting and maintaining the roller alignment can further reduce the risk of tunneling and bubbles during operation.
Regularly Clean Rollers
Have you noticed your laminator producing uneven or blurry results? Regularly cleaning your rollers is essential for smooth operation. A proper cleaning schedule helps prevent issues like silvering and bubbles. Here’s what you should do:
- Use a soft cloth and mild cleaning solution for roller maintenance.
- Avoid abrasive materials that could scratch or damage the rollers.
- Clean after every few uses or weekly, depending on usage.
- Inspect rollers for residue or buildup, and address immediately.
Keeping your rollers clean ensures consistent lamination quality and prolongs your machine’s lifespan. Skipping this step can lead to adhesive buildup, causing jams or blurriness. Stick to a regular cleaning schedule to keep your laminator functioning effectively and avoid common problems.
Use Proper Temperature
Are you using the correct temperature settings on your laminator? Proper temperature is vital for good adhesion and preventing issues like bubbles or silvering. If the temperature is too low, laminating adhesives won’t bond properly, leading to weak seals or wrinkling. Too high, and you risk melting or damaging delicate paper textures. Adjust the heat based on your materials; thicker or textured papers often need a slightly higher setting, while smooth, lightweight papers require less heat. Always test with scrap pieces first to find the most effective temperature. Consistently maintaining the right temperature ensures smooth lamination, reduces bubbles, and prevents tunneling or silvering. Proper temperature control keeps your laminator functioning efficiently and extends its lifespan. Monitoring temperature with a reliable thermometer helps ensure you’re maintaining precise heat settings for optimal results. Regularly checking and calibrating your laminator’s temperature settings can also help prevent common issues and improve overall performance.
Store Laminator Correctly
Properly storing your laminator helps maintain its performance and prevents common problems like jamming, warping, or sticky rollers. Good storage practices are essential for laminator safety and longevity. To ensure peak function, follow these storage best practices:
- Turn off and unplug the laminator before storing.
- Let it cool completely to avoid heat damage.
- Roll up power cords neatly to prevent fraying.
- Store in a dry, dust-free area to avoid dirt buildup and moisture.
These steps help prevent the buildup of debris, protect delicate components, and keep your laminator ready for use. Proper storage not only extends your laminator’s lifespan but also helps you avoid costly repairs caused by neglect or improper handling.
When and How to Adjust Temperature and Pressure Settings
Adjusting the temperature and pressure settings on your laminator is essential when you notice issues like bubbles, wrinkles, or incomplete adhesion. First, check the temperature calibration to ensure it’s set correctly for your lamination material. If the film doesn’t adhere properly or shows silvering, increase or decrease the temperature gradually. Next, consider pressure adjustment; if the pressure is too light, air bubbles and wrinkles can form. Increase pressure steadily to ensure even contact and secure adhesion. Conversely, if the pressure is too high, it might cause tunneling or creases. Always make small adjustments and test with a scrap piece first. Properly calibrated temperature and pressure settings help achieve smooth, bubble-free lamination every time.
Common Mistakes to Avoid for Flawless Laminating Results
To achieve flawless laminating results, it’s important to recognize common mistakes that can undermine your efforts. One major error is neglecting laminator maintenance, which can cause bubbles or uneven sealing. Another mistake is using poor-quality laminating accessories, leading to wrinkles or jams. Failing to align your documents properly results in crooked edges or tunneling. Lastly, rushing through the process without checking temperature and pressure settings can cause silvering or bubbles. To avoid these pitfalls, guarantee regular laminator maintenance, choose compatible accessories, carefully align your sheets, and double-check your settings before starting. By paying attention to these details, you’ll prevent common issues and achieve professional-looking results every time.
Final Tips for Troubleshooting Persistent Laminator Problems
When persistent laminator issues arise, it’s essential to methodically troubleshoot each component of your machine. Start with a thorough laminator maintenance routine, ensuring rollers are clean and aligned. Use a troubleshooting checklist to identify common problems like bubbles, tunneling, or silvering. Regular maintenance prevents issues from worsening and extends your laminator’s lifespan.
| Problem | Solution |
|---|---|
| Bubbles or Silvering | Check for debris, clean rollers, adjust temperature |
| Tunneling | Adjust pressure, clean rollers, verify alignment |
| Jammed Material | Clear jams carefully, inspect rollers for damage |
| Inconsistent Heating | Calibrate temperature settings, inspect heating elements |
Following this troubleshooting checklist helps resolve persistent problems efficiently.
Frequently Asked Questions
Can Environmental Factors Affect Laminator Performance?
Environmental factors definitely impact laminator performance. You need to maintain proper humidity control and temperature stability to guarantee smooth operation. High humidity can cause bubbles and silvering, while fluctuations in temperature may lead to tunneling or uneven lamination. By keeping the environment steady, you prevent these issues and achieve consistent, high-quality results. Regularly monitor your workspace conditions to avoid these common laminating problems and keep your equipment running smoothly.
Are There Specific Laminator Brands More Prone to Silvering or Bubbles?
Imagine a lighthouse guiding ships through fog—some brands, like those with shaky reputations, tend to cast a dim glow, making silvering and bubbles more likely. Based on user reviews and brand reputation, budget or lesser-known laminators often struggle with these issues more than trusted, reputable brands. You’ll find that investing in well-reviewed models usually offers smoother lamination, reducing the risk of silvering and bubbles, so your projects stay crystal clear.
How Does Laminate Thickness Influence Tunneling Issues?
You’ll find that thicker laminates can increase tunneling issues because they challenge the laminator’s ability to maintain uniform pressure. To prevent this, you should focus on laminate uniformity and guarantee proper thickness calibration of your equipment. Proper calibration helps distribute pressure evenly across the lamination, reducing the risk of tunneling. Adjusting the laminator settings based on your laminate’s thickness can markedly improve results and minimize tunneling problems.
Can Using Old or Expired Laminates Cause Problems?
Using old or expired laminates can definitely cause problems. Over time, laminate shelf life diminishes, and expired adhesives lose their effectiveness, leading to issues like poor adhesion, bubbling, or tunneling. You might notice the laminate doesn’t stick properly or starts to peel. Always check the expiration date and replace old supplies to guarantee smooth lamination, avoiding costly mistakes and maintaining high-quality results.
What’s the Best Way to Store Laminators to Prevent Damage?
To prevent damage, you should store your laminator properly by following storage best practices. Keep it in a cool, dry place away from direct sunlight and humidity. Always turn it off and unplug it after use, and perform regular laminator maintenance by cleaning the rollers and checking for any wear. Cover it with a dust cover or store it in a protective case to avoid dust buildup and accidental damage.
Conclusion
Remember, patience and attention to detail are key to flawless laminating. By preparing your documents properly, choosing the right settings, and maintaining your laminator, you can avoid issues like silvering, bubbles, and tunneling. Don’t rush the process—“A stitch in time saves nine.” With these tips, you’ll master your laminator and achieve professional results every time. Keep practicing, and soon, troubleshooting will become second nature.