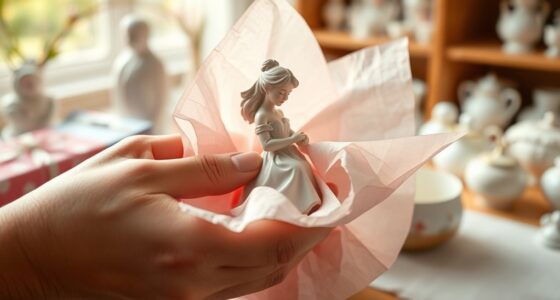
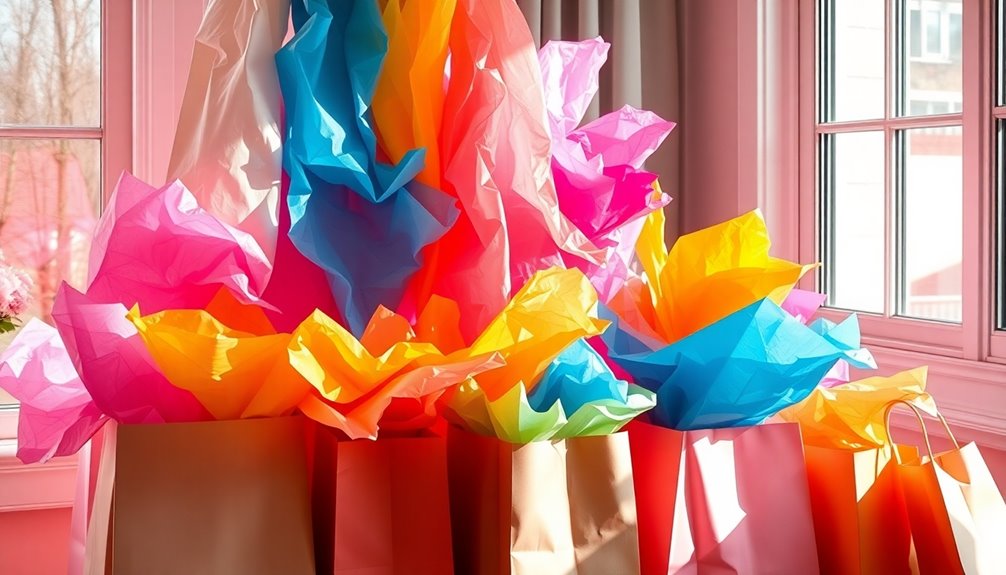
Arranging tissue paper in gift bags is a fun art form that can elevate your gift-giving experience. Start by layering two to four sheets of paper, pinching the center and swirling it for volume. Mixing colors and patterns adds visual interest and reflects your unique style. Make sure to fluff the tissue to keep it upright. A simple raffia or satin bow can finish the look beautifully. Remember, balance is key—you don't want to overstuff and clutter the bag. Curious about more tips and techniques to perfect your tissue paper arrangements? There's plenty more to explore!
Key Takeaways
- Pinch and swirl tissue paper at the center to create volume and an appealing shape for your gift bags.
- Use a combination of two to four sheets, depending on bag size, for a balanced and full appearance.
- Experiment with mixing colors and patterns to enhance the visual interest and personalization of your gift presentation.
- Fluff the tissue paper to ensure it stands upright and adds dimension to the overall design.
- Finish your arrangement with a raffia or satin bow for an elegant and charming touch.
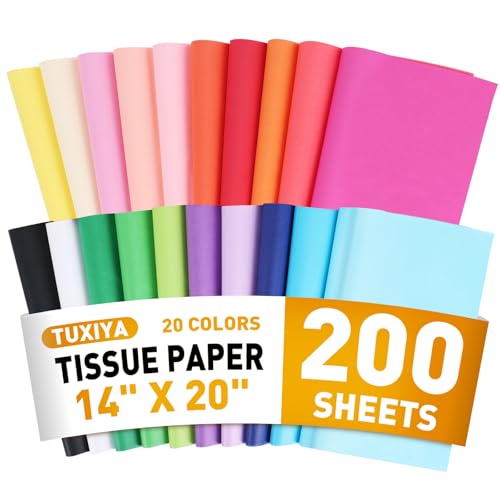
200 Sheets Tissue Paper, 20 Colors 14" X 20" Tissue Papers for Gift Bags Birthday Party Flower Decoration, Colored Tissue Paper Bulk for Packaging
20 COLORS AVAILABLE – This colorful tissue paper provides 20 classic colors (10 pieces of each color), such…
As an affiliate, we earn on qualifying purchases.
As an affiliate, we earn on qualifying purchases.
Creative Tissue Arrangements Explained
When it comes to creative tissue arrangements, a little effort can make a big difference in how your gift bag looks. Start by laying out two sheets of tissue paper flat. Pinch the center and swirl it to add volume and dimension. This simple technique can transform your arrangement from flat to fabulous. If you're using a larger bag, consider adding up to four sheets for a fuller appearance.
Mixing colors and patterns can enhance the visual appeal of your gift bag. Think about seasonal themes or the recipient's preferences when choosing your tissue paper. A vibrant combination can really make your gift stand out. After arranging, don't forget to fluff the tissue paper as needed. This ensures it stands upright, creating an eye-catching display that draws attention to the gift inside.
To elevate the overall presentation, finish off your bag with a cute raffia or satin bow. This little detail will complement your tissue arrangement beautifully, making your gift not just a surprise but a visual delight. With these creative tissue arrangements, you're sure to impress anyone who receives your thoughtfully wrapped gift.

Tinoaly 30 Sheet Flower Wrapping Tissue Paper, 19.69×13.78in, Colourful, Floral Printed Decorative Ideal for Gift Wrapping, Crafts & Occasional Celebrations
Product List: You will receive 30 sheets of tissue paper, which are ideal choice for wrapping gifts, and…
As an affiliate, we earn on qualifying purchases.
As an affiliate, we earn on qualifying purchases.
Tissue Paper Folding Techniques

Mastering tissue paper folding techniques can take your gift bag presentation to the next level. Start by opening your tissue paper flat. Pinch the center to create volume; this adds a dynamic look to your arrangement. Once you've pinched it, swirl the tissue paper around to form a visually appealing shape that helps conceal the contents of the bag.
For smaller bags, you might want to use one or half sheets of tissue paper. This way, you save resources while still achieving an attractive finish. If you're dealing with larger bags, layering four sheets of tissue paper is a game-changer. It creates a fuller, more luxurious appearance that enhances the overall gift.
Don't hesitate to mix colors and patterns of tissue paper, either. It can elevate the aesthetic and allow for a little bit of creative expression that coordinates beautifully with your gift bag's color scheme. So, when you're putting together your gift, remember these techniques. I'm going to guarantee that with just a little bit of practice, you'll impress everyone with your refined tissue paper skills!

White Glitter Tissue Paper for Gift Bags 36 Sheets 14×20 Inch – Recyclable Wrapping Paper for Weddings, Birthdays, Party & Festival Decorations DIY Craft Supplies
Subtle & Elegant Embedded Glitter: Our tissue paper features glitter embedded directly into the paper, ensuring a luxurious…
As an affiliate, we earn on qualifying purchases.
As an affiliate, we earn on qualifying purchases.
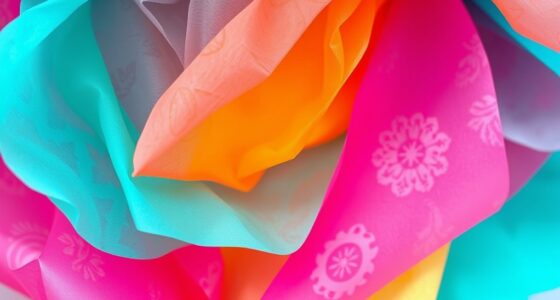
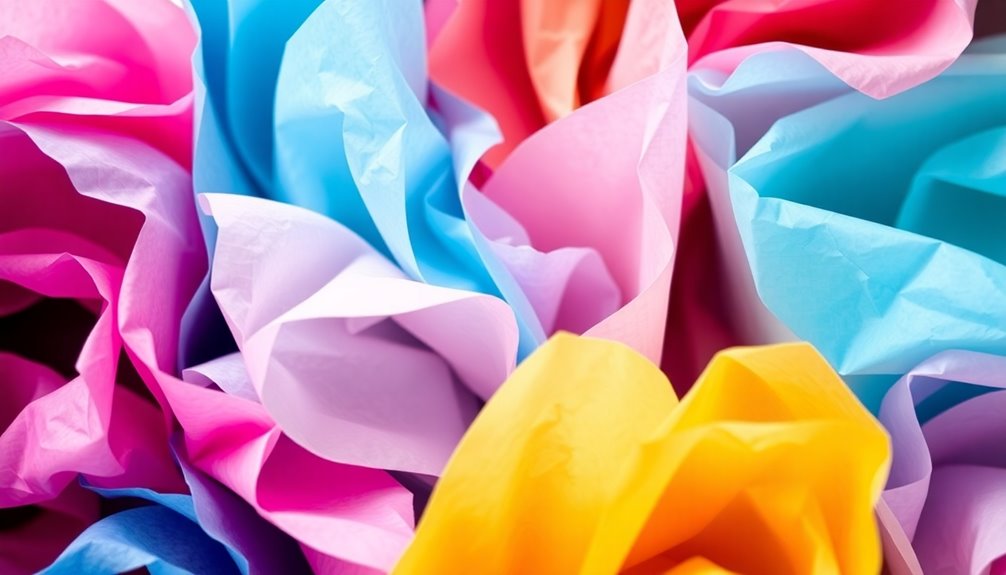
Layer Colors for Visual Impact

Layering colors in your tissue paper arrangement can transform an ordinary gift bag into a stunning centerpiece. By mixing vibrant colors with subtle patterns, you create a dynamic visual effect that draws attention and adds depth to your presentation. For smaller bags, use two sheets of tissue, while larger bags benefit from four sheets. This not only enhances volume but also ensures your gift is well-protected and beautifully displayed.
Coordinating the colors of your tissue paper with the gift bag can create a cohesive look. On the other hand, using contrasting colors provides a striking visual impact that can make your gift stand out even more. Consider incorporating seasonal themes through your color choices. For example, warm colors can evoke a cozy autumn feel, while bright pastels may suit a spring celebration.
Ultimately, layering colors thoughtfully adds excitement to your gift bag, making it more inviting. Don't hesitate to experiment with different combinations until you find the perfect balance that reflects the occasion and your personal style. With a little creativity, your tissue paper arrangement can elevate the entire gifting experience.

6 PCS Large Pull Bows, Gift Wrapping Bows, Gift Wrapping Ribbon Pull Bows Gift Bows for Wedding, Birthday, Christmas, Valentine's Day, Gift Baskets, Party, Presents Decor, Holiday Decor (Blue)
Packaging: 6PCS bows for gift wrapping, it is suitable for most gift wrapping,making your gifts more unique and…
As an affiliate, we earn on qualifying purchases.
As an affiliate, we earn on qualifying purchases.
Benefits and Drawbacks Overview
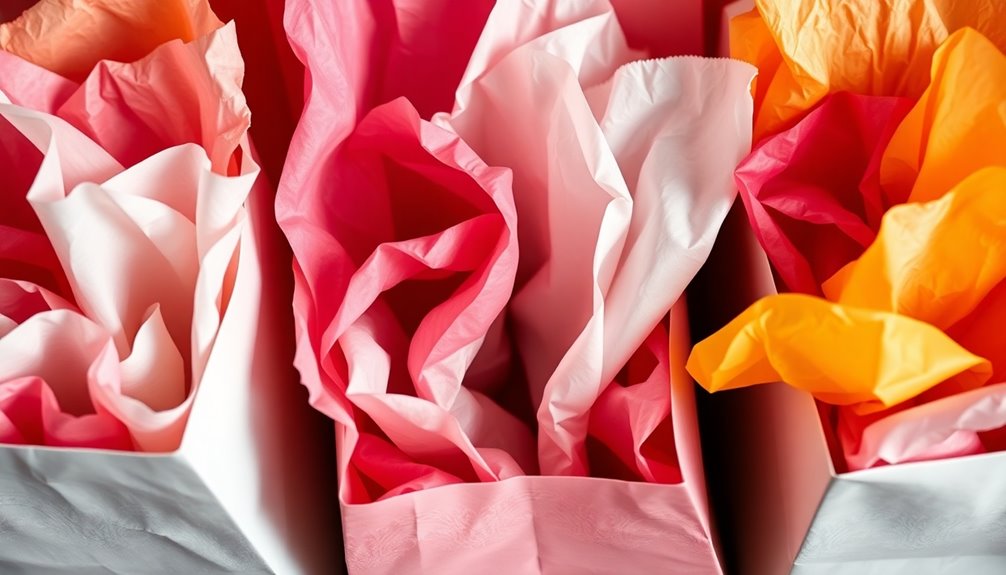
Arranging tissue paper in gift bags offers both benefits and drawbacks that can affect your gifting experience. On one hand, properly arranged tissue paper enhances the aesthetic appeal of your gift bag, making it more inviting and exciting for the recipient. Using two sheets for smaller bags and four for larger ones ensures adequate coverage while maintaining a balanced look. Mixing colors and patterns can create a visually striking arrangement, allowing you to personalize the gift to match the occasion.
However, there's a downside to consider. Overdoing it with too much tissue paper can make the bag look cluttered or overwhelming, detracting from the gift itself. Additionally, if you don't fluff and swirl the tissue properly, it might appear flat and uninteresting, which could lessen the overall impact of your presentation. Attention to detail is crucial; coordinating tissue paper colors with the bag and adding decorative bows can significantly enhance the experience, but it requires time and effort. Striking the right balance between creativity and simplicity is essential to ensure that your gift makes a lasting impression while being easy to manage.
Successful Gift Bag Designs

Creating a stunning gift bag design hinges on thoughtful details that capture attention. Start by selecting the right size of tissue paper for your gift bag. For smaller Rose size bags, using two sheets of tissue paper provides ample coverage, while one or even half a sheet works for even smaller bags.
When preparing your gift bag, always identify the front and back by locating the seam. This small detail helps you present the gift securely and attractively. To add volume and visual impact, fluff the tissue paper by pinching it in the center and swirling it. This technique elevates the overall presentation.
Don't shy away from mixing colors and patterns of tissue paper. Creative combinations can reflect seasonal themes or your personal tastes, making each gift unique and memorable. Finally, add a cute raffia or pre-tied satin bow as a finishing touch. This not only completes your design but also enhances its appeal to the recipient. By focusing on these details, you'll create gift bags that are not just functional but also delightful to behold, ensuring your gifts make a lasting impression.
Tissue Paper Aesthetic Enhancements
Often, a well-chosen combination of colors and patterns in tissue paper can transform a simple gift bag into a striking visual masterpiece. By mixing various colors and patterns, you create a dynamic presentation that captures attention and enhances the overall aesthetic. Consider coordinating the tissue paper with your gift bag's color for a cohesive look that elevates the gift-giving experience.
To add dimension, fluff the tissue paper by pinching and swirling it at the center. This technique not only gives volume but also introduces texture, making your arrangement more eye-catching. Seasonal themes can also play a significant role; choose tissue paper that reflects the occasion, whether it's bright colors for a birthday or muted tones for a winter holiday.
Don't forget the finishing touches! Adding a color-coordinated raffia or satin bow can significantly enhance the visual appeal of your tissue paper arrangement. These small details tie everything together, leaving a lasting impression on the recipient. With these tips, you can easily elevate your gift bag design into an artful presentation that delights both you and the person receiving the gift.
Frequently Asked Questions
How to Make Tissue Paper Look Fancy in a Gift Bag?
To make tissue paper look fancy in a gift bag, start by pinching the center and swirling it for volume. Use vibrant colors and patterns, coordinating them with your bag for a cohesive look. For smaller bags, two sheets work well, while four sheets create a more extravagant display in larger bags. Finish it off with a cute raffia or satin bow to add a polished touch that enhances the overall presentation.
Should I Put Tissue Paper in a Gift Bag?
Absolutely, you should put tissue paper in a gift bag! It not only adds volume and flair but also enhances the overall presentation of your gift. Depending on the bag size, you might need one to four sheets. When you fluff and swirl the tissue paper, it creates a dynamic look that grabs attention. Plus, mixing colors or patterns personalizes the bag, making your gift feel even more special. Don't forget that cute bow on top!
How to Arrange Tissue Paper in a Gift Basket?
To arrange tissue paper in a gift basket, start by laying it flat and pinching the center to create a swirl for added volume. Use two sheets for smaller baskets and up to four for larger ones. Mix colors and patterns to match the basket's theme, enhancing visual appeal. Fluff the tissue paper as you go to create an enticing display. Finally, top it off with a cute bow for that perfect finishing touch!
How Many Sheets of Tissue Paper per Gift Bag?
When you're filling gift bags, the number of tissue paper sheets you'll need varies by size. For smaller rose bags, use two sheets for a full look, or just one for a more economical option. Larger vogue bags typically need four sheets for an appealing presentation. Don't forget to mix colors and patterns, and try swirling and fluffing the tissue to elevate the overall look of your gift bag!