To cut mat board like a frame shop, use a sharp utility knife or craft cutter with a quality straightedge for clean, precise edges. Always measure carefully, double-check your marks, and secure the mat firmly on a cutting mat to prevent slipping. Make multiple light passes instead of one deep cut for sharper corners. Attention to detail and patience are key—keep practicing, and you’ll master professional results every time. Continue exploring these techniques to perfect your craft.
Key Takeaways
- Use a sharp utility knife and a high-quality straightedge for precise, clean cuts.
- Secure the mat board firmly on a cutting mat to prevent slipping during the cut.
- Mark cutting lines lightly with a sharp pencil, double-check measurements for accuracy.
- Make multiple light passes with the knife at a consistent 45-degree angle for perfect corners.
- Layer and align mats carefully, ensuring edges are straight and edges are overlapped slightly for a professional finish.

X-ACTO #1 Z-Series Precision Utility Knife, Metal, Silver, Aluminum Handle, Includes Safety Cap – For Precise, Fine Cuts
The sharpest and most durable X-Acto blade ever
As an affiliate, we earn on qualifying purchases.
As an affiliate, we earn on qualifying purchases.
Why Precise Cutting Is Key to Professional Framing
Precise cutting is essential for achieving a polished, professional look in framing. The mat board history reveals that early artisans valued craftsmanship, emphasizing clean, exact cuts to enhance artwork. Today, precise cuts not only improve aesthetics but also reduce waste, which impacts the environment—highlighting the importance of mindful practices. Incorporating Free Floating techniques can further enhance your framing projects by allowing more flexibility and creativity. Proper blade sharpness ensures cleaner cuts and less material waste, making your work more efficient. Ensuring measurement accuracy is fundamental to avoiding costly mistakes and achieving consistent results. Poorly cut mats can result in uneven edges, distracting from the artwork and undermining your efforts. Using accurate measurements and sharp blades ensures your cuts are smooth and consistent, elevating your framing quality. Additionally, understanding the environmental impact of mat board waste encourages you to cut thoughtfully, preserving resources. Practicing these techniques can also help you develop a more professional skillset, elevating your craft and satisfaction with each project. Mastering precise cutting is a key step in creating a refined, durable finished piece, reflecting both historical craftsmanship and responsible environmental awareness.

anezus Self Healing Sewing Mat, 12inch x 18inch Rotary Cutting Mat Double Sided 5-Ply Craft Cutting Board for Sewing Crafts Hobby Fabric Precision Scrapbooking Project
【SEWING CUTTING MAT】Aneuzs self-healing cutting mat protects your work surface. Compatible with rotary cutters and straight blades, won't…
As an affiliate, we earn on qualifying purchases.
As an affiliate, we earn on qualifying purchases.
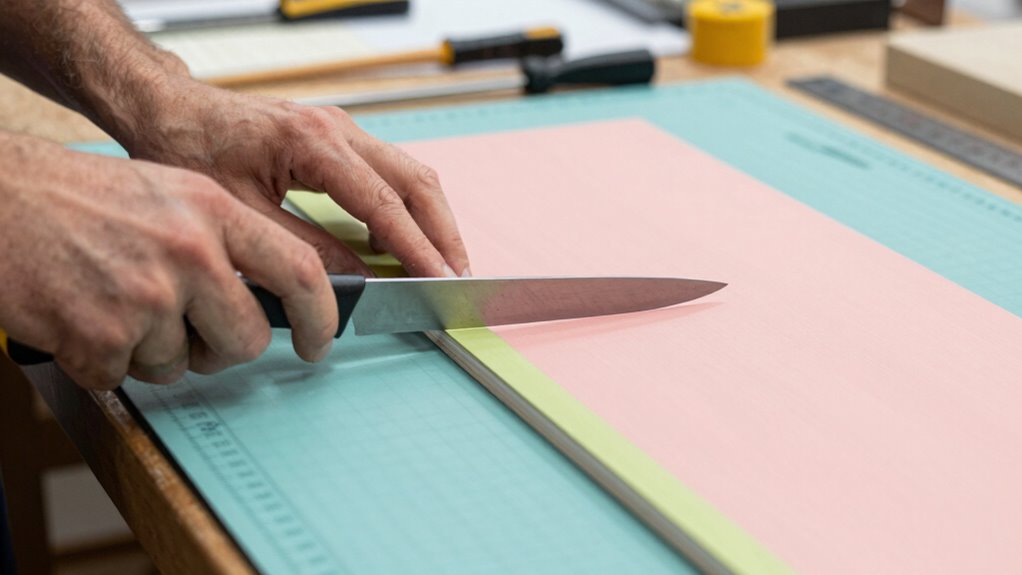
Essential Tools and Materials for Cutting Mat Boards
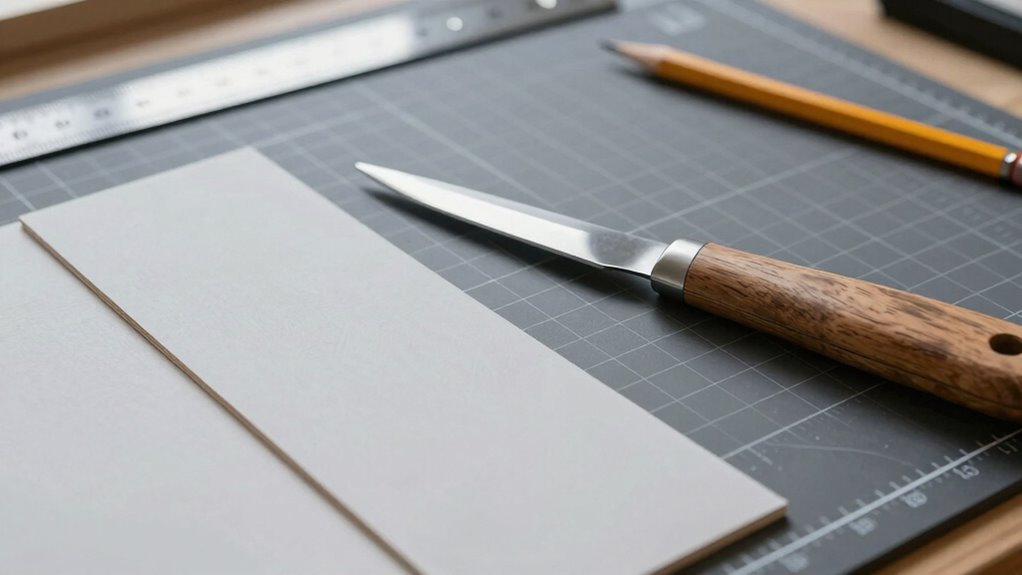
To achieve clean, accurate cuts on your mat board, having the right tools and materials is essential. First, choose the appropriate mat board types for your project; foam core, cotton, or greyboard each require specific tools for ideal results. A sharp utility or craft knife, such as a X-Acto, ensures clean edges and precise cuts. A metal ruler or straightedge provides stability and accuracy during cutting. Don’t forget a cutting mat or self-healing surface to protect your workspace and improve safety. For cutting safety, always use a cutting guard or clamp to secure the board, and handle blades carefully to prevent injury. Proper tools and materials help you achieve professional-looking results while minimizing risk. Additionally, selecting the right cutting techniques can greatly improve your precision and reduce waste. Incorporating precision measuring practices can further enhance the quality of your cuts. Being mindful of the environmental impact of tissue paper can also encourage more eco-friendly choices in your craft projects.

ZZTX Ruler Metal Straight Edge Stainless Steel Ruler 16 Inch Ruler Set Rulers Bulk 2 Pack
MATERIAL – Made of quality stainless steel to Prevent Rust & Corrosion, heavy duty and non-bendable.Stainless steel material…
As an affiliate, we earn on qualifying purchases.
As an affiliate, we earn on qualifying purchases.
How to Measure and Mark Your Mat Board for Accurate Cuts
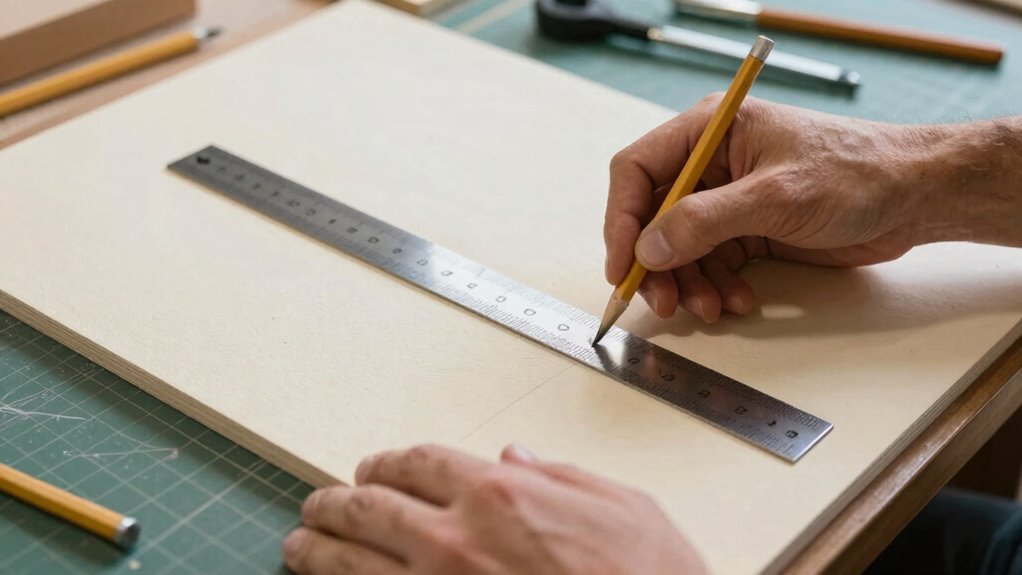
To get clean, accurate cuts, you need to master precise measurement techniques. Use a reliable ruler or T-square to mark your lines carefully, ensuring every measurement is exact. Clear, effective marking strategies help you cut confidently and achieve professional-looking results. Additionally, understanding the importance of color accuracy can help in selecting the right materials and lighting conditions to enhance your project’s final appearance. Being aware of the potential for passive voice in your instructions can improve clarity and precision in your work. Properly applying measurement accuracy techniques ensures your cuts are consistently precise and reduces material waste, which is essential for maintaining creative storytelling in craftsmanship.
Precise Measurement Techniques
Accurate measurement is the foundation of a professional-looking mat board. Begin by selecting quality mat board materials that won’t easily distort or warp. Use a sharp pencil and a metal ruler or T-square for precise markings. Always double-check your measurements before marking; even small errors can affect the final appearance. When measuring, consider the width of the border and the size of the opening you want. Keep safety precautions in mind—wear gloves if needed, and handle cutting tools carefully. Use a clean, flat surface to ensure accuracy and stability. Mark lightly, so lines stay clear but can be erased if necessary. Additionally, understanding the importance of measurement accuracy can help prevent costly mistakes and ensure your project’s success. Paying close attention to proper measuring techniques can make the difference between a polished finish and a crooked cut. Remember that taking your time during measurement will contribute to a more professional result.
Effective Marking Strategies
Effective marking starts with choosing the right tools and setting them up properly. Use a sharp pencil or fine-tip marker for clear, precise lines. Before marking, select a color that matches or complements your mat board to guarantee visibility without distracting from the final piece. Measure carefully, focusing on consistent margins for a professional look. Use a ruler or T-square for straight, accurate lines, especially when planning for edge finishing. When marking, double-check measurements, and make light, deliberate lines to prevent smudging or misalignment. Proper marking assures your cuts are clean and accurate, reducing waste and improving the overall presentation. Paying attention to detail at this stage helps achieve sharp edges and a polished finish, giving your mat board a professional, frame-shop quality appearance. Incorporating herbal wellness techniques, such as using natural tools or calming routines, can also improve your focus and precision during this process.
Retractable Mat Cutter – 45° Bevel Blade Mat Board Cutting Cutter Tool for Framing, Artwork, Custom Mat Board, Picture Frames
Retractable Safety Blade: Our mat cutter features an auto-retracting blade mechanism that retracts after cutting to prevent accidental…
As an affiliate, we earn on qualifying purchases.
As an affiliate, we earn on qualifying purchases.
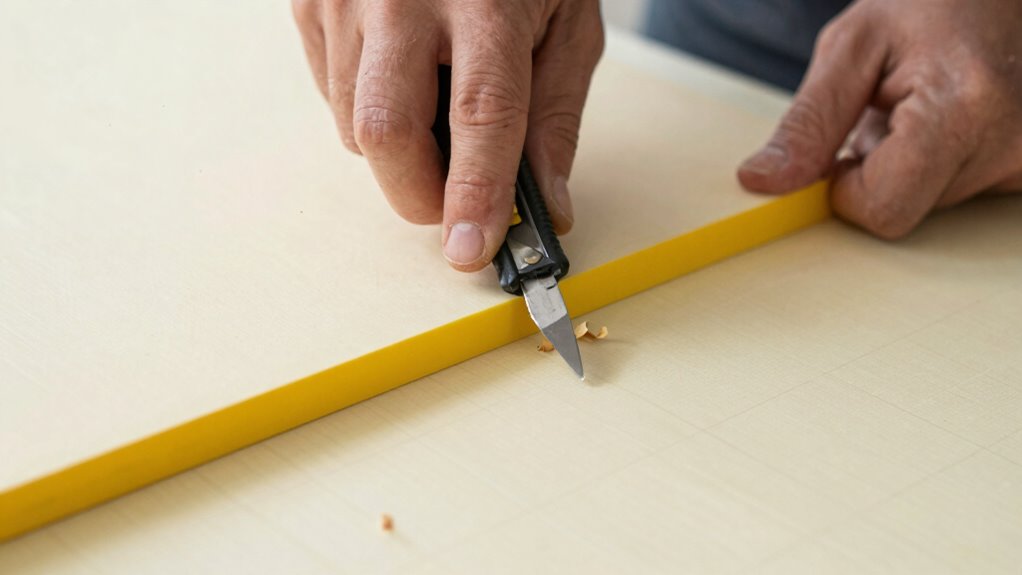
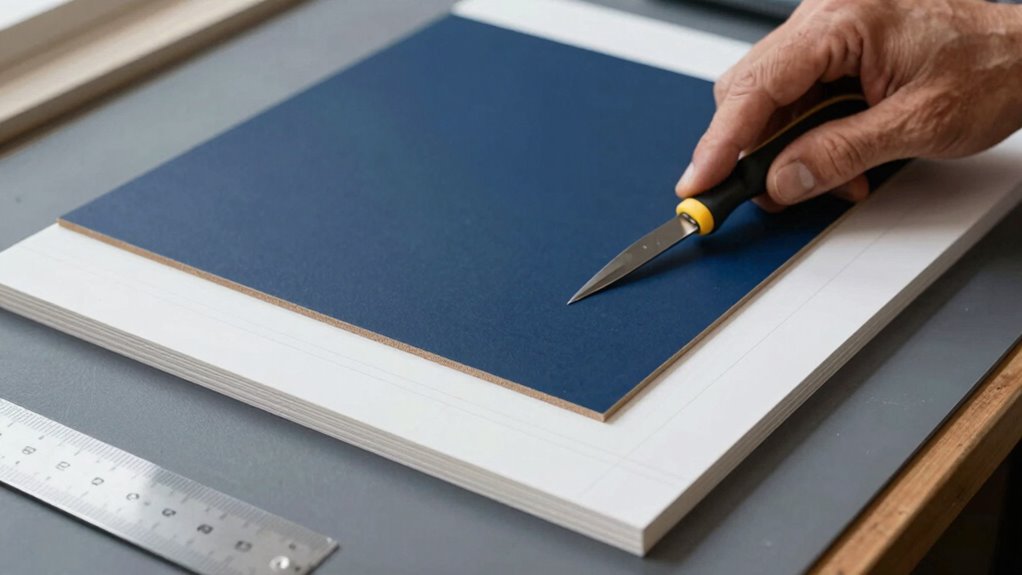
Step-By-Step: How to Make Clean Cuts With a Mat Cutter or Utility Knife

Making clean cuts with a mat cutter or utility knife starts with preparing your materials properly. First, confirm your blade is sharp—regular utility knife sharpening prevents jagged edges and makes cutting easier. Always prioritize mat cutter safety by wearing gloves and using a cutting mat to protect surfaces and fingers. When cutting, align your measurement lines carefully and secure the mat firmly to avoid slipping. Use steady, even pressure, and follow your marked lines precisely, applying consistent force. For best results with a utility knife, make multiple light passes instead of one heavy cut, which reduces tearing. Keep your blades sharp and clean, and replace dull blades promptly. Properly measuring and marking your cuts ensures accuracy before you begin. Additionally, using a high-quality cutting tool can significantly improve your results and safety. Incorporating a cutting guide can help maintain straight lines and precision. Following these steps helps you achieve crisp, professional-looking cuts every time. Being aware of blade maintenance and replacing blades as needed also prolongs your tool’s effectiveness and safety. Using a sharp blade regularly is essential for clean, precise cuts and to reduce the risk of accidents.
Tips for Perfect Corners and Layering Double Mats
Getting perfect corners and seamless double mats starts with precise cutting techniques. You’ll want to stack your mats carefully to guarantee alignment and avoid gaps. With attention to detail, you can achieve professional-looking layered mats that enhance your framing project. Ensuring your tools are sharp and your measurements are accurate can make all the difference in achieving clean, crisp edges. Proper measurement accuracy is essential for consistent results and a polished appearance.
Precise Corner Cutting Techniques
Achieving perfect corners and seamless layering when cutting mats requires careful attention to detail. Using precise corner cutting techniques ensures clean, professional results with your mat board materials. To improve accuracy:
- Use a sharp utility knife and a straightedge for clean cuts.
- Cut at a consistent 45-degree angle for corners, ensuring they align perfectly.
- Measure twice before cutting to prevent mistakes.
- Practice your corner cuts on scrap pieces to refine your technique.
Properly executed corner cutting techniques prevent gaps and misalignments, especially when layering double mats. Focus on steady, even pressure and precise angles to achieve sharp, crisp corners. This attention to detail guarantees your finished project looks polished and professional, mimicking the quality of a frame shop.
Stacking for Alignment Accuracy
To guarantee your double mats align perfectly and your corners stay sharp, stacking carefully before making cuts is essential. Use layer stacking to ensure each mat layer stays in position, preventing shifting during cutting. Keep the layers flat and aligned, pinching edges together or taping them lightly if needed. When stacking, double-check the alignment accuracy at each corner, making sure edges and corners are flush. This prevents gaps or misalignments in your finished piece. Consistent stacking also helps maintain straight, clean cuts, especially on multiple layers. Take your time to align each layer precisely, adjusting as needed before cutting. Proper stacking reduces errors, ensures clean corners, and results in professional-quality mats every time. Embracing a growth mindset can help you develop patience and precision in your craft, leading to continually improved results.
Layering Double Mats Seamlessly
When layering double mats, careful attention to how the edges and corners meet is essential for a seamless look. To achieve this, consider the mat board textures and color options to create depth and harmony. Use these tips:
- Match or complement textures for smooth transitions.
- Choose contrasting or coordinating mat board colors to enhance layers.
- Cut edges precisely for sharp, neat corners.
- Overlap edges slightly to hide any gaps or uneven cuts.
Aligning corners perfectly ensures clean joints and professional results. Take your time trimming each mat board, and use a sharp craft knife for accuracy. When layering, keep the textures and colors in mind for a cohesive finish. Proper layering elevates your display, giving it a polished, gallery-quality appearance.
Common Cutting Problems and How to Fix Them
Cutting mat board can sometimes lead to problems like uneven edges, jagged cuts, or the board slipping out of place. One common issue is blade dullness, which causes rough, uneven edges. If your cuts aren’t smooth, it’s time to replace or sharpen your blade. Uneven pressure during cutting also causes problems; pressing too hard or too lightly results in inconsistent lines. Make sure you apply steady, even pressure along the entire cut. Additionally, ensure your mat board is securely positioned on a stable surface to prevent slipping. Using a sharp blade and maintaining consistent pressure will help you achieve clean, professional-looking cuts. Paying attention to these details can eliminate most common cutting frustrations and improve your overall results. Proper blade maintenance can extend the life of your tools and ensure consistently precise cuts.
Final Tips for Achieving Shop-Quality Mat Cuts at Home

Achieving shop-quality mat cuts at home is entirely possible with the right techniques and attention to detail. To enhance your mat board art and framing aesthetics, follow these final tips:
- Use a sharp, fresh blade for clean, precise cuts every time. Dull blades cause rough edges that detract from professional quality.
- Measure twice, cut once—accurate measurements ensure perfect fits and consistent borders.
- Secure the mat board firmly to prevent shifting, which can ruin your cut lines.
- Practice patience and take your time—rushing compromises the precision and overall look.
Frequently Asked Questions
How Do I Choose the Right Mat Board for Framing Projects?
When choosing the right mat board for your framing projects, consider mat board textures and color coordination. Select a texture that complements your artwork—smooth or linen finish for elegance, or textured for depth. Match the mat’s color with your piece or the frame for harmony, avoiding overly bright shades that distract. Test different options to see how textures and colors work together, ensuring your finished display enhances your art beautifully.
Can I Cut Thick or Layered Mat Boards Effectively at Home?
Think of thick or layered mat boards as a stubborn knot in your creative tapestry—you can handle them with the right approach. Use sharp, heavy-duty knives and apply layered board techniques, such as score-and-snap or multiple cuts, to navigate thick material handling. Patience and proper tools turn what seems intimidating into a smooth cut, giving your framing project a polished, professional finish.
What Safety Precautions Should I Follow When Using a Utility Knife?
When using a utility knife, make certain your blade is sharp to prevent slips and uneven cuts. Always maintain a proper grip, keeping your fingers away from the blade’s path. Work on a stable surface and cut slowly, applying consistent pressure. Wear safety gloves if needed, and always retract the blade after use. These precautions help keep you safe while achieving precise cuts on mat boards or other materials.
How Do I Prevent Frayed or Torn Edges During Cutting?
To prevent frayed or torn edges during cutting, guarantee you regularly clean your blade to maintain sharpness, which helps make clean cuts. Secure the material firmly with tape or clamps to prevent shifting that can cause jagged edges. Use a straightedge as a guide for precision, and apply steady, even pressure while cutting. These steps help you achieve smooth, professional-looking edges every time.
Are There Alternative Tools for Cutting Mat Boards Besides a Mat Cutter?
Yes, you can use alternative tools for cutting mat boards besides a mat cutter. A sharp utility knife or X-Acto knife allows precise cutting with controlled cutting techniques. A straightedge or metal ruler helps guide your cuts, ensuring clean edges. For larger projects, a rotary cutter and cutting mat can also work well. Just make sure to use steady pressure and proper support to avoid frayed or uneven edges.
Conclusion
With the right tools and techniques, you can achieve professional-looking mat cuts right at home. Don’t worry if your first few attempts aren’t perfect—practice makes perfect, and even seasoned pros make mistakes. Just stay patient, follow these steps, and you’ll be surprised how quickly your framing skills improve. Before you know it, you’ll be creating polished, gallery-quality mats that truly enhance your artwork or photos. Happy cutting!