
To prevent ‘melted’ meshes when scanning small objects, make certain your workspace has even, diffuse lighting and secure the object firmly in place. Regularly calibrate your scanner for accuracy, and choose ideal settings for high resolution and sensitivity. Proper environment control—free of dust, vibrations, and airflow—also helps. Adjusting mesh resolution and refining calibration improve detail capture. For detailed tips and techniques, continue exploring how to set up your equipment for flawless small object scans.
Key Takeaways
- Ensure precise scanner calibration and stable setup to accurately capture tiny details.
- Use diffuse, even lighting to minimize shadows and glare that cause mesh distortion.
- Secure the small object firmly on a stable surface to prevent movement during scanning.
- Match scanner resolution and exposure settings to the object’s size and surface complexity.
- Perform regular calibration checks and post-process meshes with smoothing and hole filling for quality.

Revopoint INSPIRE 2 3D Scanner for 3D Printing Handheld, Up to 0.03mm Precision, Multi-Line Laser/Structured Light, Wireless/Outdoor Scanning, Full-Color Scan, for iOS/Android/Win/macOS, Standard
Wireless Scanning & Interactive Streaming: Built-in WiFi 6.0 enables on-the-go, structured light mobile scanning or real-time PC-to-mobile interactive…
As an affiliate, we earn on qualifying purchases.
As an affiliate, we earn on qualifying purchases.
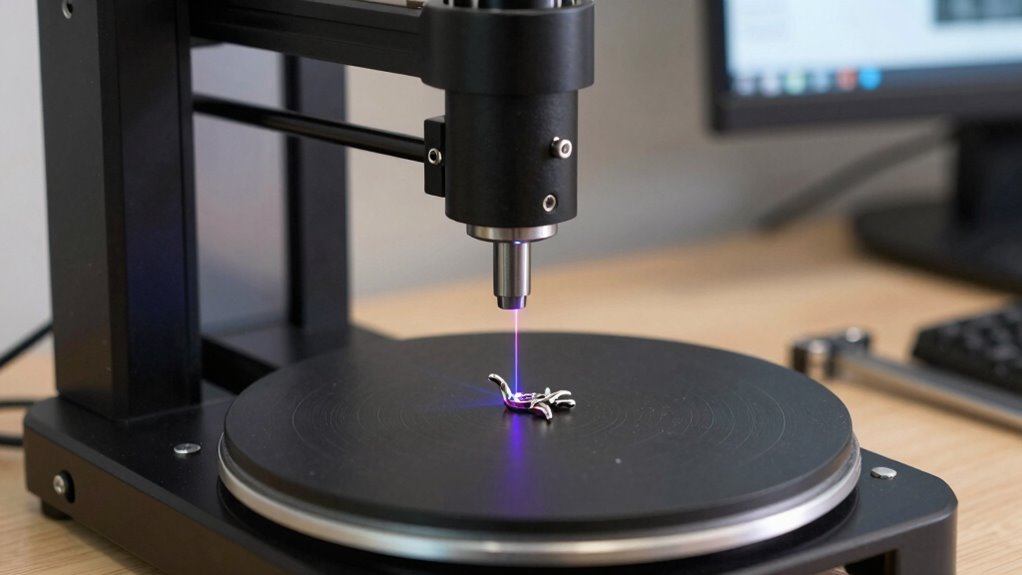
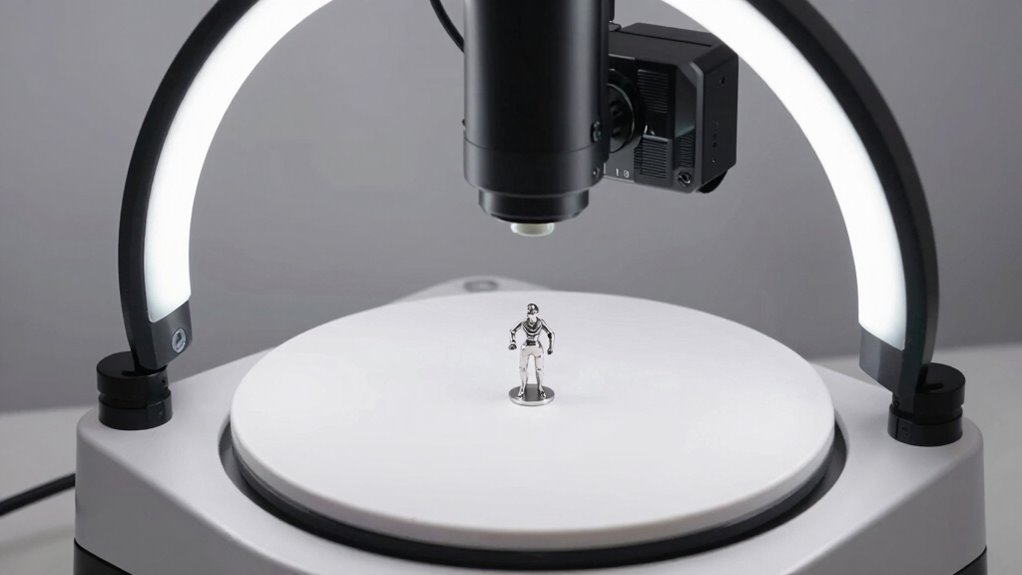
Why Do Small Object Meshes Get ‘Melted,’ and How Can You Fix It?
Small object meshes often appear “melted” or distorted during printing because the layers don’t bond properly, and the details are too fine for the printer to reproduce accurately. This mesh distortion happens when the scanner isn’t properly calibrated, leading to inaccuracies in capturing tiny features. When your scanner isn’t calibrated correctly, it fails to record precise measurements, resulting in a mesh that looks melted or blurred. To fix this, make certain your scanner is properly calibrated before scanning small objects. Calibration aligns the scanner’s sensors, improving detail accuracy and reducing distortion. Additionally, adjusting print settings like layer height and print speed can help mitigate mesh distortion. Proper scanner calibration is vital for capturing sharp details, preventing the “melted” appearance in your small object meshes.

Creality CR-Ferret SE 3D Scanner for 3D Printing, Anti-Shake, 0.1Mm Precision, 30FPS Scanning Speed, Full-Color, Upgraded Desktop 3D Scanner for Body Hair Black Metal Non-Reflective Objects
HIGH ACCURACY & FASTER: Boasting an impressive accuracy of up to 0.1mm, a resolution of 0.16mm, and a…
As an affiliate, we earn on qualifying purchases.
As an affiliate, we earn on qualifying purchases.
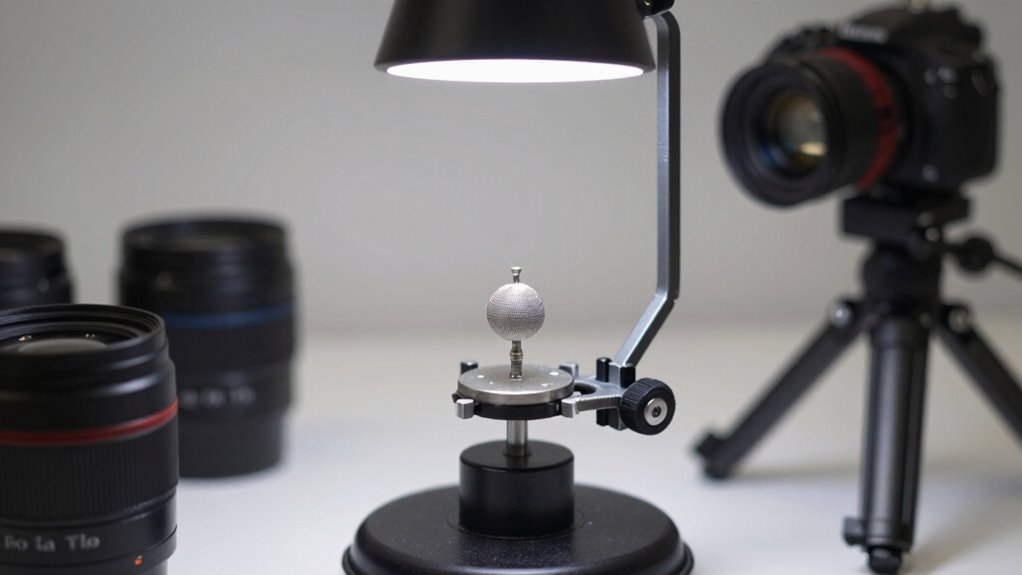
How to Prepare Your Equipment and Environment for Flawless Small Object Scans
To achieve flawless small object scans, you need to carefully prepare your equipment and environment beforehand. Start with lighting optimization by ensuring your workspace is evenly lit without harsh shadows or glare, which can distort details. Use consistent, diffuse lighting to highlight the object’s features clearly. Next, perform calibration procedures on your scanner regularly, following manufacturer instructions, to guarantee accurate measurements. Proper calibration reduces errors caused by misalignment or sensor drift. Keep your scanning area free of dust, vibrations, and airflow that could affect stability. Use a stable surface and secure your object firmly in place. Adjust lighting and calibration as needed before each scan session to ensure consistent, high-quality results. Proper preparation minimizes artifacts and prevents mesh melting issues. Additionally, understanding content formats helps you select the best setup for your specific scanning needs.

Revopoint 6 mm 3D Scanning Marker Dots for 3D Scanners, 3D Tracking Dots, High Reflectivity Reference Point Stickers, Diffuse Markers, 200 Points
Size: Inner diameter 6.0 mm,outer diameter10.0 mm, total 200 points in 4 sheets.
As an affiliate, we earn on qualifying purchases.
As an affiliate, we earn on qualifying purchases.
What Scanning Settings and Techniques Will Help Preserve Mesh Detail?

Selecting the right scanning settings is essential for capturing detailed mesh data without losing fidelity. Start by optimizing your lighting setup—use diffuse, even lighting to minimize shadows and glare that can obscure surface details. Proper calibration techniques are equally important; ensure your scanner is precisely calibrated to avoid distortions or missed features. Adjust the exposure and resolution settings to match the small object’s size and surface complexity, preventing mesh melting or over-smoothing. Keep the scanner’s sensitivity high enough to detect fine textures, but avoid excessive settings that generate noise. Regularly reviewing and fine-tuning your calibration can help maintain accuracy throughout your scanning process. Keep testing and verifying your setup’s accuracy through test scans, refining your lighting and calibration as needed. These techniques help preserve intricate details and produce high-quality, true-to-life meshes.

ANGSO-AUTO ADAS Calibration Tool Kit Compatible with Honda Toyota Kia Ford ADAS Radar Aiming Calibration Tool,Post with 0-30 Centimeter Scale,Corner Reflector Target with Billet Aluminum Stand
Universal Compatibility: Fit for Honda, Toyota, Kia, and Ford vehicles,Whether you're a professional mechanic or a DIY enthusiast,…
As an affiliate, we earn on qualifying purchases.
As an affiliate, we earn on qualifying purchases.
Troubleshooting Common Small Object Scanning Problems
Even with carefully optimized scanning settings, small object scanning can still present challenges like missing details or generating noisy data. One common issue is insufficient mesh resolution, which causes the scan to lack fine details. To fix this, increase the mesh resolution in your scanner’s settings, ensuring the software captures more surface intricacies. Additionally, poor lighting calibration can lead to shadows or glare that distort the data. Double-check your lighting setup, making sure it’s evenly calibrated and diffused to minimize reflections and shadows. Proper lighting helps the scanner accurately capture surface textures. If problems persist, verify that your scanner’s calibration process is current and precise. Addressing mesh resolution and lighting calibration issues remarkably improves scan quality, especially for small objects where every detail counts. Moreover, understanding the importance of color accuracy can help you achieve more precise and true-to-life scan results, particularly when capturing objects with subtle color variations.
Post-Processing Tips to Clean and Sharpen Your Mesh Results

Once you’ve completed your scan, cleaning and sharpening your mesh are essential steps to achieve a polished result. To improve your model’s quality, focus on mesh smoothing to reduce noise and irregularities. Use detail enhancement techniques to emphasize fine features without over-sharpening. Consider these tips:
Post-scan cleaning and sharpening are vital for a polished, professional-looking mesh.
- Apply automated mesh smoothing tools to create a cleaner surface
- Use selective detail enhancement to preserve intricate features
- Remove stray vertices and fill holes for a seamless mesh
- Adjust mesh decimation to balance detail and performance
- Utilize sharpening filters carefully to sharpen edges without introducing artifacts
- Remember to celebrate the history of craftsmanship and precision, much like the achievements celebrated in golf heritage, to inspire meticulous attention to detail in your modeling process. Paying attention to mesh topology can significantly improve the quality of your final model. These methods help refine your mesh, making it look more accurate and professional. Proper post-processing ensures your small object scans are both clean and highly detailed.
Frequently Asked Questions
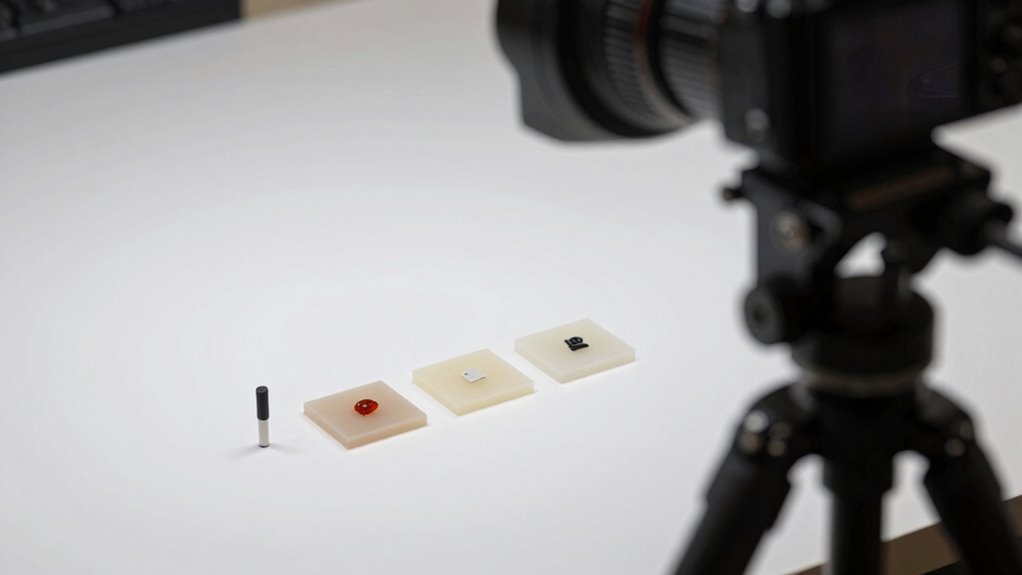
What Types of Small Objects Are Most Challenging to Scan Accurately?
You find tiny jewelry and miniature figurines most challenging to scan accurately because their small size makes capturing fine details difficult. Their intricate features and delicate structures tend to cause errors or distortions in the mesh, especially if your setup isn’t optimized. To improve results, you need precise calibration, good lighting, and careful handling. Without these, the scans might look melted or blurry, losing essential details of these tiny objects.
How Does Ambient Lighting Affect Small Object Scanning Quality?
Imagine you’re scanning a shiny jewelry piece in bright sunlight; harsh lighting conditions can cause glare, making it tough to capture accurate details. Ambient lighting directly impacts scan quality by affecting surface reflectivity and creating shadows or reflections that distort data. To improve results, you need controlled lighting, diffusers, or a light box. Proper lighting guarantees your small object scans are clear, precise, and free from artifacts.
Can Different Scanning Technologies Improve Small Object Mesh Fidelity?
Different scanning technologies can indeed improve small object mesh fidelity. For example, laser scanners often provide higher accuracy compared to structured light systems, especially with reflective or translucent materials. When comparing technologies, consider material properties like reflectivity and surface texture, which can affect scan quality. By choosing the right technology and understanding material considerations, you can achieve more detailed, precise meshes, preventing issues like mesh distortion or loss of detail.
What Are the Costs Associated With High-Precision Small Object Scanners?
High-precision small object scanners come with significant cost considerations. Equipment expenses are usually high, often ranging from several thousand to tens of thousands of dollars, depending on the technology and accuracy needed. You’ll also need to allocate funds for maintenance, calibration, and potential upgrades over time. While these costs might seem steep initially, investing in quality equipment ensures detailed, accurate meshes that meet your precision requirements effectively.
How Long Does the Entire Scanning and Post-Processing Process Typically Take?
The entire scanning and post-processing process is like a well-choreographed dance, usually taking about 1 to 3 hours. You’ll spend a few minutes adjusting scan speed to guarantee detail without sacrificing quality. The post-processing time varies based on complexity, typically adding another 30 minutes to an hour. With efficient setup, you can balance scan speed and post-processing, making your workflow smooth and timely.
Conclusion
By following these tips, you’ll turn your small object scans from a blurry mess into crystal-clear captures. It’s all about setting the stage right and paying attention to details—don’t let your efforts go to waste. With patience and the right approach, you’ll avoid the pitfalls that can turn your mesh into a melted mess. Remember, a little prep goes a long way, so keep your tools sharp and your focus sharper—success is just around the corner.